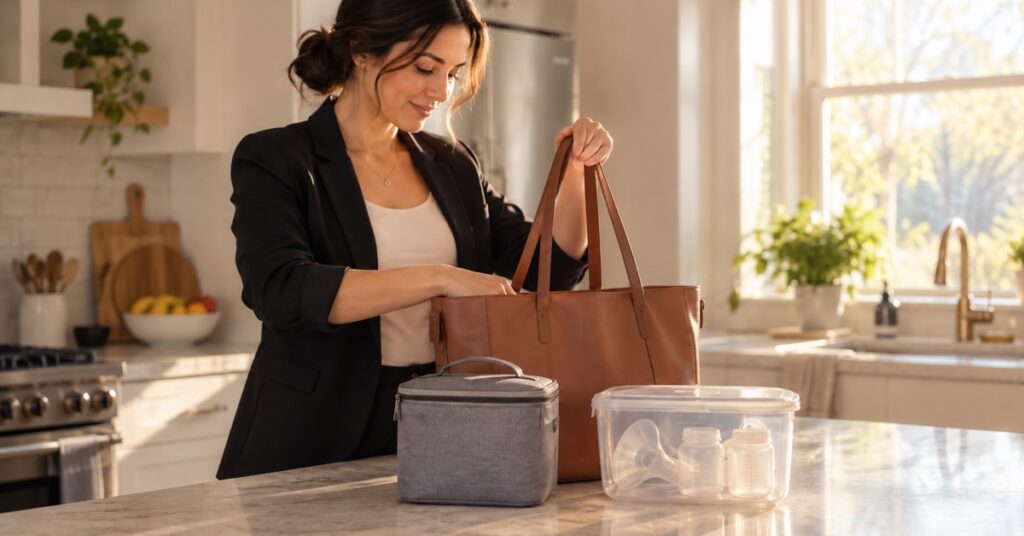
Before buying anything for pumping at work, walk through the second pumping session. Where is the milk from the first one? Which clean parts will you use now? When you leave work, where will all that milk go?
If you cannot wash and dry parts at work, pack a complete clean set for each planned session. If you can, make sure there is somewhere to leave them while they dry. Either way, each batch needs a storage container and a cold place until it gets home. You may already own most of what this requires.
Use your baby’s usual breast-milk feeds while you are apart as a starting point for planning sessions. The CDC advises pumping about as often as your baby drinks breast milk. The example below uses three sessions to make the packing decisions concrete; it is not a schedule for every parent. CDC: pumping breast milk
Find out what your workplace actually provides
Before your first day back, confirm how you will get into the pumping space, how to reserve it if it is shared, and where you can go if it is occupied. Check the outlet if your pump needs one. Include the walk to the room, setting up, putting milk away and handling parts when discussing breaks.
A sink answers only part of the cleaning question. You also need a place to wash parts in a dedicated basin and a protected area where they can air-dry. A room that must be cleared immediately after each booking may leave you nowhere to put wet parts.
Ask about the refrigerator and freezer separately. A refrigerator can store milk, but it will not refreeze an ice pack for the journey home. Decide whether frozen packs can stay in a workplace freezer or whether your transport setup needs a different cold-source plan.
For most employees covered by the US Fair Labor Standards Act, federal protections include reasonable pumping breaks and a private space other than a bathroom for one year after birth. Coverage and limited exceptions matter, and state or local laws may add protections. The Department of Labor’s PUMP at Work guidance explains the details. DOL: PUMP at Work
Choose how you will have clean parts for the next session
The choice between washing at work and bringing extra sets comes down to the space and time you have. The CDC specifically includes bringing multiple kits when workplace washing is impractical. CDC: returning to work
Wash your hands before pumping or handling clean parts and milk. If you will wash parts at work, use the supplies your pump’s instructions require: a basin reserved for infant feeding items, dish soap and an appropriate dedicated brush. Take milk-contact parts apart, wash and rinse them, then leave them to air-dry on a clean, unused towel or paper towel in a protected place. Do not put them directly in the sink or rub them dry with a dish towel. Follow the pump maker’s directions for delicate valves and membranes; a brush that cleans a bottle may damage a small valve. CDC: pump hygiene
Allow for drying time as well as washing time. A folding rack can hold parts, but it cannot make them dry before your next break. If that timing will not work, rotate in another clean, dry set.
If you cannot wash at work, count complete sets. For double pumping, one complete set means the parts needed for both sides, including the collection bottles or cups. A pack with two individual flanges or two single-side accessory kits may supply just one double-pumping session. It is not necessarily two complete sets. Check the exact contents against your pump model and the flange size that already fits you. You can use the same pump motor; follow its instructions for tubing and other parts that do not contact milk.
Keep clean, fully dry parts protected in a clean container or bag. Give used parts a separate, clearly marked container so they cannot be mistaken for a ready-to-use set. When washing is unavailable, take the used sets home and wash them as soon as you can, before reuse. Extra sets move that cleaning to a time when you can do it; they do not remove it.
Wipes do not replace washing milk-contact parts before their next use. Refrigerating used parts does not clean them, either. This plan uses a clean set each time. If you use a steam bag for sanitizing, wash first, check that the parts can be steamed, and follow that exact bag’s water, loading and microwave instructions. FDA: cleaning a breast pump · CDC: pump hygiene
Count the milk containers as well as the pump parts
Consider a workday with three double-pumping sessions, a reliable office refrigerator and no practical washing space. If each session’s milk fits in its two collection bottles, one straightforward arrangement is three complete double-pumping sets and six compatible bottle caps. Each pair of bottles stays with that session’s milk.
After session one, cap and label the first pair of bottles and put them in the refrigerator. Put the used flanges and other detachable milk-contact parts in the used-parts container. At session two, take out the second clean set. Repeat with the third set later in the day. By departure, you have six capped bottles of milk and three sets of used parts to carry home.
This is packing arithmetic, not a recommendation to buy six new bottles. Count what you already own and check the amount your bottles can hold. With a different pump or milk volume, the container count will change. With a clean-and-dry cycle between sessions, you may need fewer sets, but you still need somewhere to store the milk while you wash and reuse the collection bottles.
Pouring milk into storage bags can free up a bottle for cleaning; it does not make the emptied bottle clean. If you are skipping washing at work, transferring milk into a bag does not let you reuse the same milk-contact bottle at the next session.
There is also no need to consolidate every batch during the workday. Keeping sessions separate avoids another transfer and makes the storage times easier to follow. If you do combine batches, cool the fresh milk before adding it to older chilled milk, and keep the storage deadline of the oldest milk. A two-bottle chiller therefore needs a plan for the third batch; total advertised capacity alone does not answer where the new milk will cool. CDC: storage questions
Give the milk a cold place after every session
Cap or seal each container, label it with the expression date and time, and put it into the refrigerator or your prepared cooler promptly. Add your name in a shared workplace. Breast milk can be stored with other food in a refrigerator suitable for food storage; a separate mini-fridge is not automatically necessary. CDC: returning to work · CDC: pump hygiene
For refrigerated storage, the temperature should be 40°F (4°C) or below. Use the back of a shelf rather than the door. If the temperature is uncertain, check it with an appliance thermometer instead of relying on how cold the fridge feels. CDC: storage questions · CDC: milk storage
Keep milk in clean, food-grade containers with tight-fitting lids or bags specifically made for breast milk. If bottles can take it straight from collection to the next feeding, they may save a transfer. Storage bags can make sense for freezing or portioning, but they are not a required step between the pump and refrigerator. CDC: milk storage
If there is no workplace refrigerator
Plan from the first pumping session until the milk reaches reliable refrigeration, including the trip home and any pickup or errands. For example, milk expressed at 9 a.m. and refrigerated at home at 6 p.m. needs nine hours of cold storage. The length of the paid shift is not the whole interval.
The CDC allows expressed milk to be stored and transported in an insulated cooler with frozen ice packs for up to 24 hours. That general guidance is not a tested holding time for every bag, chiller or loading arrangement. Prepare the cold source as instructed, check that the containers and cold source fit together, and keep the cooler closed as much as practical. A bag’s insulation alone is not the complete setup. CDC: milk storage · CDC: travel and transport
Check the product instructions for the conditions that matter to your day: whether it cools freshly expressed milk or holds already chilled milk, how it must be loaded, and any temperature or time limits. Keep successive batches in separate containers while they cool. A claim about a sealed, pre-chilled container does not establish what happens when warmer milk is added repeatedly.
For a long shift, outdoor work or a route with delays, arrange somewhere to refrigerate milk or replace the frozen cold source if your setup cannot cover the full interval. Avoid leaving the cooler in a hot parked car. If cooling fails, use the actual time and temperature to check the CDC storage limits. Do not feed milk when you cannot establish that it stayed within those limits; a bag feeling cool or a color-changing label cannot establish that for you.
The same cooler planning applies to the commute when your milk has spent the day in an office fridge. Load it with a frozen cold source at departure and put the milk into the home refrigerator or freezer promptly, or use it right away. Keep the original expression date and time. Moving milk into a different refrigerator does not restart its storage clock. CDC: milk storage · CDC: storage questions
Pack once before the first workday
Lay out the pump and power supply, the planned number of clean sets, all the milk containers and lids, the cold-storage setup, and the container for used parts. Include any washing supplies you intend to use. Then add your normal work items and close the bag.
Try taking out the next clean set without putting it on the used-parts container. Check that bottles can remain secure and that the milk is separated from the pump motor and electronics. An existing tote may work. If it does not, the items that will not fit give you a useful shopping requirement. Our pump-bag guide covers carrying choices in more detail.
Use your usual pump during this rehearsal. Check that the power setup works and that you can assemble every spare set. If you use a hands-free pumping bra with conventional flanges, check the opening position and support as the bottles fill; support should not pull or press painfully.
Plan for a forgotten part or power failure, too. Practicing hand expression before returning to work gives you a way to express into a clean collection container if the pump is unavailable. That milk still needs the same safe handling and storage. CDC: pumping breast milk
After the rehearsal, write down only the gaps you found. Perhaps you need one more compatible set, enough lids to keep the batches separate, or a frozen cold source that fits beside the bottles. If the load already works, there is no need to replace it with a matching kit.
Make the evening reset small enough to repeat
Put the milk away before unpacking the rest of the bag. Decide what will be used soon and what needs freezing. For freshly expressed milk kept refrigerated at 40°F (4°C) or below, the CDC’s limit is up to four days; if you do not expect to use it within that time, freeze it promptly. This is not the storage limit for previously frozen milk. CDC: milk storage
If you need to prepare daycare bottles, check which containers, labels and portions the caregiver accepts before choosing your workday storage system. A container that works for both steps can reduce transfers, when it is compatible with the feeding equipment and the caregiver’s requirements. Our daycare bottle-packing guide covers that handoff.
Open the used-parts container and start washing early enough for the parts to air-dry fully. Use the dishwasher only for pieces the manufacturer says are dishwasher-safe. Clean the used-parts container too, and let it dry before packing it again. If another adult is helping, hand over the whole reset: washing, allowing parts to dry and assembling tomorrow’s sets. Otherwise the final sorting can still land on you in the morning.
Sanitizing is an additional step after washing. The CDC particularly emphasizes daily sanitizing for babies under two months, babies born prematurely and babies with weakened immune systems; it may not be necessary daily for older, healthy babies when parts are cleaned carefully after each use. Follow your equipment’s instructions and any care plan for your baby. Sanitizing does not mean wet parts are ready to seal into tomorrow’s bag. CDC: pump hygiene
Before bed, check tomorrow’s clean sets and return the cold source to the freezer as its instructions require. Charge the pump if needed. If the parts repeatedly remain wet or the evening washing is too much, change that part of the plan: begin washing earlier, use a permitted dishwasher cycle, share the reset, or add a rotation set that actually reduces the bottleneck. Choose the adjustment after seeing where the day breaks down.
The first week gives you better information than an empty bag on the kitchen table. Keep a short note of what ran out, what stayed unused and what took too long. That is the list to use before buying anything else.
Editorial note: This guide draws on CDC and FDA guidance and research into workplace pumping constraints; it does not describe personal product testing. Its general feeding guidance is intended for healthy, full-term infants. For a baby with a hospital or specialist feeding plan, follow that plan’s storage and equipment-care requirements.