If you’ve ever scrolled through Montessori playroom photos online, you’ve probably noticed a pattern: massive rooms, floor-to-ceiling shelving, natural light pouring through bay windows, and not a single crumb in sight. It looks like a magazine spread — and about as realistic as one, too.
Here’s the truth most Montessori accounts won’t tell you: you don’t need a dedicated room to create a beautiful, functional Montessori play space. You need a corner. Maybe just four feet by three feet of floor space. A low shelf, a handful of well-chosen toys, and a system that keeps things simple. Setting up a Montessori playroom in small spaces is not only possible — it’s actually easier than doing it in a big room.
As a mom of three — ages one through five — I know what it’s like to try to make Montessori work without a spare room. Our play spaces have lived in all kinds of corners and shared spaces throughout the house. None of them looked like a Pinterest board, and all of them worked. Because Montessori isn’t about square footage. It’s about intention.
In this guide, I’ll walk you through the exact principles, layouts, and products that make a Montessori playroom work in small spaces — the kind of spaces real families actually live in.
Why Montessori Actually Works Better in Small Spaces
This might sound counterintuitive, but smaller spaces force you to do exactly what Montessori philosophy recommends: keep things minimal, intentional, and within the child’s reach.
One of the most common mistakes parents make is filling a large playroom with too many toys and too much furniture. The child gets overwhelmed, jumps from toy to toy without focusing, and the room ends up looking like a toy store exploded in it by 10 a.m. I’ve been that parent. I once set out way too many activities thinking more options meant more engagement — and instead, my child just stood there, not knowing where to start. Less really is more.
A small space naturally limits the number of toys on display. That limitation is actually a gift — it helps your child concentrate on what’s in front of them, choose independently, and develop the deep focus that Montessori environments are designed to cultivate.
Maria Montessori herself believed that children thrive in what she called a “prepared environment” — a space that is orderly, accessible, and scaled to the child. That environment can exist in a 500-square-foot apartment just as easily as in a 3,000-square-foot house. A Montessori playroom in small spaces simply means being more intentional about every item you include.
5 Core Principles for Small-Space Montessori Setups
Before we talk about furniture and products, let’s get the fundamentals right. These five principles are your decision-making framework for everything that follows.
1. Less Is More — Always
Most Montessori educators recommend displaying only 6 to 10 activities at a time. In a small space, I’d aim for the lower end — 6 to 8 is plenty. The rest goes into a storage bin in a closet for rotation (more on this later). In our house, fewer items on display has always meant deeper, more focused play.
2. Everything at Child Height
If your child can’t see it, reach it, and put it back independently, it’s not working. This means shelves no higher than your toddler’s chest, books displayed cover-forward at their eye level, and artwork hung where they can actually appreciate it — not six feet up on the wall. Try getting down on your knees and looking at your child’s space from their perspective — you might be surprised by how much is invisible to them.
3. A Place for Everything
Children between birth and age five are in what Montessori called a “sensitive period” for order. They genuinely crave routine and predictability. Every toy, book, and material should have a designated home on the shelf. When your child knows exactly where the puzzles go and where the crayons live, cleanup becomes a matching game rather than a battle.
4. Zones Over Rooms
You don’t need a playroom. You need zones. A focus zone (shelf + small table). A reading nook (book display + soft cushion). A gross motor space (which can be a hallway or living room center). An art station (which can roll in and out on a cart). Each zone can be as small as 2 x 2 feet — and they don’t all need to be in the same room.
5. Neutral Colors, Natural Materials
This isn’t just about aesthetics — it’s functional. Super flashy colors and noisy plastic toys overstimulate children and make small rooms feel chaotic. Neutral tones (white, natural wood, cream, soft sage) make the space feel larger and calmer. Natural materials like wood and cotton also give children richer sensory information than plastic — a small wooden ball has real weight to it, while a plastic one feels like nothing.
The 4-Zone Small-Space Layout
Here’s the framework I use. You don’t need all four zones in the same room — in fact, spreading them across your home can work even better. It means your child has interesting, purposeful spaces everywhere, not just in one spot.
Zone 1: The Focus Zone (Minimum 4 × 3 feet)
This is the heart of your Montessori setup: a low shelf displaying a small number of activities, plus a child-sized table and chair where your child can sit and work on puzzles, art, or practical life activities (real-world skills like pouring water, buttoning clothes, or sorting objects — the kind of everyday tasks that build independence and fine motor control).
What you need: One low open shelf and a small table with one or two chairs. The IKEA KALLAX 2×2 laid on its side is the classic Montessori choice — four cubbies, about 30″ wide, starting around $35–$50. Each cubby holds one activity: a puzzle, a stacking toy, a practical life tray, a set of building blocks. That’s four activities right there, displayed beautifully and within reach.
If even the 2×2 KALLAX feels too big, the IKEA KALLAX single cube (about 16″ × 16″) starts around $25 and can be wall-mounted or placed on the floor. Two of these stacked give you a two-shelf display in a very narrow footprint.
Zone 2: The Reading Nook (Minimum 2 × 2 feet)
A reading nook doesn’t need to be a Pinterest-worthy canopy tent with fairy lights and a sheepskin rug. (Though if you have the space and budget, no judgment — that does sound cozy.) All you really need is a way to display books cover-forward so your child can actually see and choose them, and something soft to sit on.
What you need: A front-facing book display. The IKEA FLISAT Book Display is solid pine, only 19″ wide × 11″ deep, and sits on the floor so your toddler can browse independently. Pair it with a small rug or cushion and you’ve created a reading corner in under two square feet of floor space.
Even more space-efficient: the IKEA FLISAT Wall Storage shelves (around $9.99 each, 27½” wide). Mount two or three at your child’s eye level on any wall — even a hallway — and you have an instant forward-facing book display with zero floor space used.
Zone 3: The Gross Motor Space (Flexible Location)
This is the zone parents most often skip in small homes, and I get it — where exactly are you supposed to put a climbing triangle in a two-bedroom apartment? But children need space to move their bodies, and skipping this zone is a mistake you’ll feel in the form of a restless, bouncing-off-the-walls toddler by 4 p.m.
Options that work in small homes: A foldable Pikler triangle that stores flat against a wall when not in use. A balance board that slides under a bed or couch. A hallway cleared for riding toys or obstacle courses. Couch cushions pulled onto the floor for climbing — free and always available. Or simply the living room center during play time, furniture pushed aside, then reset for family time.
Zone 4: The Rolling Art Station (Zero Permanent Floor Space)
This is my favorite small-space hack, and the one that gets the most “why didn’t I think of that?” reactions when I share it. Instead of dedicating a permanent corner to art supplies — which in a small space means permanent paint smears and permanent clutter — put everything on a rolling cart.
What you need: The IKEA RÅSKOG trolley (standard size about 14″ × 18″ × 30″) is perfect. Three tiers give you: top shelf for current project materials (crayons, washable markers, paper), middle shelf for paint supplies and Play-Doh, bottom shelf for backup supplies and smocks. Roll it next to the child’s table during art time, roll it into a closet or against a wall when you’re done. Art time becomes an event — something special that gets rolled out — rather than a permanent mess zone.
The RÅSKOG comes in white, black, and gray-blue, blends into almost any room, and the lockable wheels mean it stays put during use. It typically runs around $30–$35, making it one of the best investments for a small-space setup.
Best Montessori Playroom Furniture for Small Spaces
Here’s a focused list of products that earn their floor space in tight quarters. I’ve specifically chosen items that are compact, multi-functional, or foldable — because in small spaces, every single inch matters.
Shelving
IKEA KALLAX 2×2 Shelf Unit (laid horizontally): This is the go-to Montessori shelf for good reason. Four open cubbies, clean lines, about 30″ wide × 30″ tall when horizontal. It’s low enough for a toddler to reach every section, and the cubbies naturally limit clutter by giving each activity its own defined space. Pair with DRÖNA fabric boxes (a few dollars each) for toys with small pieces. Starting around $35–$50.
IKEA TROFAST Storage System: If your child has lots of small toys — Legos, play food, vehicles — the TROFAST’s pull-out bins are easier for little hands to manage than open shelves. The frame is low to the ground and modular. A great trick: print photos of what goes in each bin and tape them to the front so even non-readers know exactly where things go.
Book Displays
IKEA FLISAT Book Display: Solid pine, front-facing, floor-standing. Only 19″ wide and 11″ deep — small enough to fit beside a bed or in a corner without crowding the room. Holds around 6–10 books depending on thickness. Max load 22 pounds.
IKEA FLISAT Wall Storage: At around $9.99 each, these wall-mounted ledges are the most space-efficient book display option. Mount at your child’s height, display 3–4 books per shelf with covers facing out. Takes up zero floor space. Available in green, pink, and gray-turquoise.
IKEA BEKVÄM Spice Rack (Budget Hack): This is the classic Montessori IKEA hack that launched a thousand Pinterest boards: a $9.99 spice rack turned into a wall-mounted book shelf. Mount it at child height with the bar at the top to hold books in place. You can fit 3–4 picture books per rack, and the narrow profile barely protrudes from the wall. At under $10, you can buy three or four and create a whole book wall for less than the price of one “real” bookshelf.
Table and Chairs
IKEA FLISAT Children’s Table: Adjustable to three heights, so it grows with your child from toddler through preschool. Solid pine to match the FLISAT shelf. The table surface lifts to reveal storage underneath — a small-space bonus for keeping works-in-progress tucked away.
IKEA MAMMUT Table and Chairs: Plastic, stackable, lightweight, and virtually indestructible. Not the most aesthetically Montessori choice, I know — but hear me out. If you have multiple kids, use the table outdoors too, or deal with regular paint-and-glue situations, this is the more practical choice. The rectangular MAMMUT table is especially good for tight spaces since it can push flush against a wall. And honestly? Kids don’t care that it’s plastic. They care that they can reach it.
Gross Motor Equipment
Foldable Pikler Triangle: Look for a version that folds flat for storage. When folded, most are about 4″ thick and can lean against a wall or slide behind a door. When set up, it provides climbing, balancing, and imaginative play. Kids turn these into everything from puppet theaters to blanket fort frames — and of course, mountains to conquer. Many options available on Amazon and Etsy, often with ramp attachments for added versatility.
Balance Board (Wobble Board): Takes up almost no storage space since it can lean against a wall or slide under a couch. Children use it for balance training, as a bridge for toy cars, as a rocking seat, or as a tunnel for stuffed animals. It’s one of the most versatile open-ended toys you can own — and adults secretly love using it too.
What About Multiple Kids in One Small Space?
This is the question that comes up most often, and the one that Montessori Instagram almost never addresses — probably because it’s messy and complicated and hard to photograph beautifully.
With three kids at different developmental stages, here’s what I’ve found works:
Share the shelf, split the levels. If you have a 2×4 KALLAX (eight cubbies), use the bottom row for your youngest’s activities and the top row for your older child. Each child gets their own “territory” at their own height. The baby can’t reach the older child’s small-piece puzzles, and the older child feels respected with their own space.
Stagger your rotation schedule. When you rotate toys, don’t swap everyone’s activities at the same time — the chaos is real. Try rotating one child’s toys mid-week and the other’s on weekends. It keeps things manageable and gives each child their own moment of “new shelf excitement.”
Accept that it won’t look perfect. Two or three children sharing a play space means extra entropy. Some days the balance board is upside down with a stuffed cat riding it and crayons are in the block basket. That’s fine. The system works when the cleanup routine works — not when every moment is perfectly curated.
Use vertical separation. Wall-mounted book shelves at different heights for different kids. Hooks at different levels for coats and bags. Even a simple rule like “your books live on the left shelf, your brother’s on the right” creates enough order for young children to feel ownership over their space.
Toy Rotation: The Secret Weapon for Small Spaces
If there’s one single strategy that makes a Montessori playroom work in small spaces, it’s toy rotation. The concept is simple: instead of having all your child’s toys out at once, you keep a small selection on display and store the rest. Every week or two, you swap a few items in and out.
Why It’s a Game Changer
Toy rotation solves the two biggest problems of small-space parenting at the same time. First, it keeps your play area uncluttered and manageable — you only need shelf space for 6–10 items, not 50. Second, it makes old toys feel new again. When a child sees a toy that’s been in the closet for two weeks, they light up like it’s brand new. Toys that were ignored become exciting again simply because they’ve been away for a while. It’s basically the Marie Kondo approach to childhood.
How to Set Up Your Rotation System
Start by gathering all of your child’s toys in one place. This part can be emotional — you’ll probably realize you own way more toys than you thought. Sort them into three piles: donate or pass on (outgrown, broken, or never played with), active (goes on the shelf now), and rotation storage (goes in a bin in the closet). For the rotation storage, labeled plastic bins work well — nothing fancy. A sticky note on each bin listing the contents saves you from digging through everything when it’s time to rotate.
Then observe. Watch what your child gravitates toward and what gets ignored. When a toy has sat untouched on the shelf for about a week, that’s your signal to swap it out for something from the storage bin. You don’t need a rigid schedule — just follow your child’s lead.
How Many Items by Age
These are general guidelines based on what most Montessori educators recommend: babies (6–12 months) do well with about 4–6 items on display, toddlers (1–3 years) can handle 6–10 items, and preschoolers (3–6 years) can manage 8–12 items. If your child seems overwhelmed or is jumping between activities without settling into any of them, try reducing the number. You can always add more later.
Room-by-Room Ideas (When You Don’t Have a Playroom)
Most families don’t have a dedicated playroom. Here’s how to integrate Montessori principles into the rooms you already have.
Living Room Corner
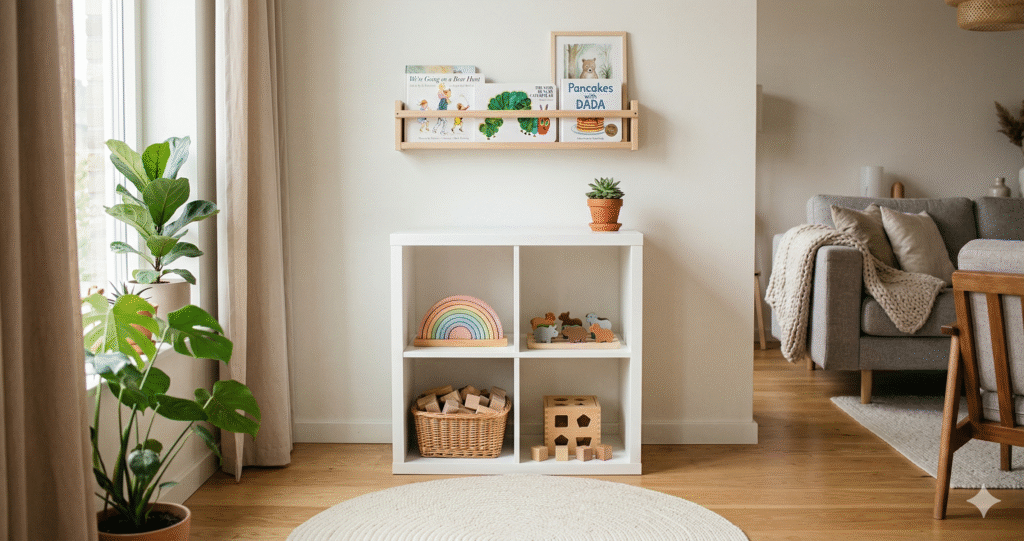
This is the most common setup for families in apartments or smaller homes, and it can work beautifully. Place a KALLAX shelf against one wall, put a small rug in front of it to define the play area, and add a FLISAT wall shelf above for books. The rug acts as a visual boundary that says “this is your space” without building actual walls. When company comes over, a well-organized Montessori shelf honestly looks like a piece of normal furniture — much better than a giant toy bin overflowing with random plastic.
Shared Bedroom
If siblings share a room, you can use a KALLAX as a low room divider — one side faces each child’s bed with their activities. Or keep it simpler: one shared shelf with a mix of both children’s activities, rotated weekly. The key is making sure each child has at least one or two items on the shelf that are “theirs” — it builds ownership and reduces fights.
Kitchen Corner
Don’t overlook the kitchen as a Montessori space — it’s actually one of the most natural environments for practical life work. Reserve half of a low cabinet for your child’s plates, cups, and utensils so they can help set the table. Add a step stool at the counter so they can participate in cooking and washing. Even a small tray with a pitcher and cup at their level creates an independent water station. These take up zero extra floor space because you’re repurposing what’s already there.
Hallway
A hallway is prime real estate for three things: wall-mounted book displays (FLISAT wall shelves are perfect here), a low coat hook for practicing dressing skills, and a clear stretch of floor for riding toys or push walkers. Hallways are usually the longest uninterrupted floor space in a home, and they’re almost always underused.
6 Common Mistakes to Avoid
Buying “Montessori” everything at once. There’s a whole industry designed to make you feel like you need a $300 wooden shelf, organic cotton play mats, and hand-carved stacking toys before you can start. You don’t. Start with one shelf, one rotation system, and observe what your child actually needs. Add from there.
Chasing the Instagram aesthetic. A Montessori space should serve your child, not your social media feed. If the IKEA MAMMUT plastic table works better for your family than a handcrafted wooden one, use it. The philosophy lives in the approach, not the price tag.
Forgetting gross motor space. Fine motor activities — puzzles, threading, drawing — get all the Montessori spotlight online. But children need to move their whole bodies every single day. If you have no room for a climbing triangle, clear a space for dancing, build cushion forts, or just go outside. Movement is non-negotiable.
Never rotating toys. If the same eight toys have been on the shelf for three months, your child has likely lost interest in most of them. Rotation is what keeps a small setup feeling fresh and engaging. Set a phone reminder if you need to — even once every two weeks makes a difference.
Placing materials too high. If you catch yourself saying “let me get that down for you” multiple times a day, something needs to come down a shelf. The whole point is independent access. Get on your knees and look at the shelf from your child’s eye level — what can they actually see and reach?
Overcomplicating the setup. You do not need labeled wooden trays, a Montessori curriculum guide, or a Pinterest-perfect color scheme. You need a low shelf, a few good toys, and the willingness to step back and let your child explore. Montessori at home is supposed to simplify your life, not add another thing to feel anxious about.
The Budget Breakdown
One of the best things about setting up a Montessori playroom in small spaces is that it’s genuinely affordable. Here’s roughly what a basic 4-zone setup costs if you go the IKEA route:
KALLAX 2×2 shelf (~$35–$50) + FLISAT Book Display or 3 BEKVÄM spice racks (~$30) + MAMMUT or FLISAT table and chairs (~$25–$65) + RÅSKOG trolley for art supplies (~$30–$35) + a small rug to define the space (~$10–$20). Total: roughly $130–$200 for a complete, functional setup.
And that’s if you’re buying everything new. Check Facebook Marketplace and your local Buy Nothing group — KALLAX shelves and FLISAT book displays show up constantly, often for free or close to it. You can also skip the art trolley entirely and use a basket or tote bag instead. The point is: a prepared environment doesn’t have to cost what the Montessori influencers might make you think it does.
Getting Started This Weekend
If you want to set up a Montessori-inspired play space this weekend, here’s all you actually need to do:
Pick one corner or wall in your most-used room. Place a low shelf there — even a single-cube KALLAX or a bookcase you already own turned on its side. Choose 6 items your child currently loves and display one per shelf section. Store the rest in a bin in a closet. Mount a FLISAT wall shelf or a BEKVÄM spice rack at your child’s eye level with 3–4 books. Put a small rug on the floor in front of the shelf. Done.
You can add a table, a reading cushion, and a rolling art cart later. But that basic setup — one shelf, six items, a few books, and a rug — is genuinely all you need to start seeing the benefits. Your child will surprise you with how long they focus, how willingly they put things back, and how much calmer the play space feels.
The most beautiful Montessori playrooms aren’t the biggest ones. They’re the ones where a child walks in, sees exactly what’s available, reaches for something that interests them, and settles into focused, joyful play. That can happen in a mansion or in a corner of your living room. The magic isn’t in the space — it’s in how you prepare it.
Want a printable setup planner?
I’m working on a free Small Space Montessori Planner with a 4-zone layout template, toy rotation tracker, and age-by-age activity checklist. Subscribe below to get it as soon as it’s ready!