The first time I threw out a full bag of breast milk, I cried harder than I’d cried in weeks. My daughter was about eight weeks old. I’d pumped at 3 AM and set the bag on the kitchen counter while I warmed a bottle. Then I got distracted by a diaper situation. I came back six hours later to find five ounces of liquid gold sitting exactly where I’d left it. Too long out of the fridge. Into the sink it went.
If you’re reading this at 11 PM on a phone with one eye open, wondering if the bag you left on the nightstand last night is still okay, I’ve been there. This guide walks you through what the CDC and the Academy of Breastfeeding Medicine actually say about storing breast milk — no guesswork, no “when in doubt, throw it out” as the only advice. It covers the real logistics: how long milk lasts at every temperature, which storage bags and containers are worth your money, and how to combine sessions. It also covers how to thaw without killing nutrients, and what to do when things go sideways (power outage, forgot a bottle, baby didn’t finish).
If you haven’t picked a pump yet, start with our guide to the best breast pumps first — the right pump makes every step downstream easier. Already pumping? Let’s get into it.
Still comparing bottles & cups?
Grab the free Bottle & Cup Cheat Sheet — nipple flow level by age, when to size up, and the bottle→straw→open-cup timeline, all on one printable page.
Your Milk’s Journey: Pump → Cool → Store → Thaw → Warm → Feed
Before I drown you in numbers, here’s the whole pipeline in plain English. Every ounce of pumped milk goes through some version of these six stages:
- Pump — into a bottle, directly into a bag, or into a wearable cup.
- Cool — bring the milk down to fridge temp (ideally within an hour) before combining or freezing.
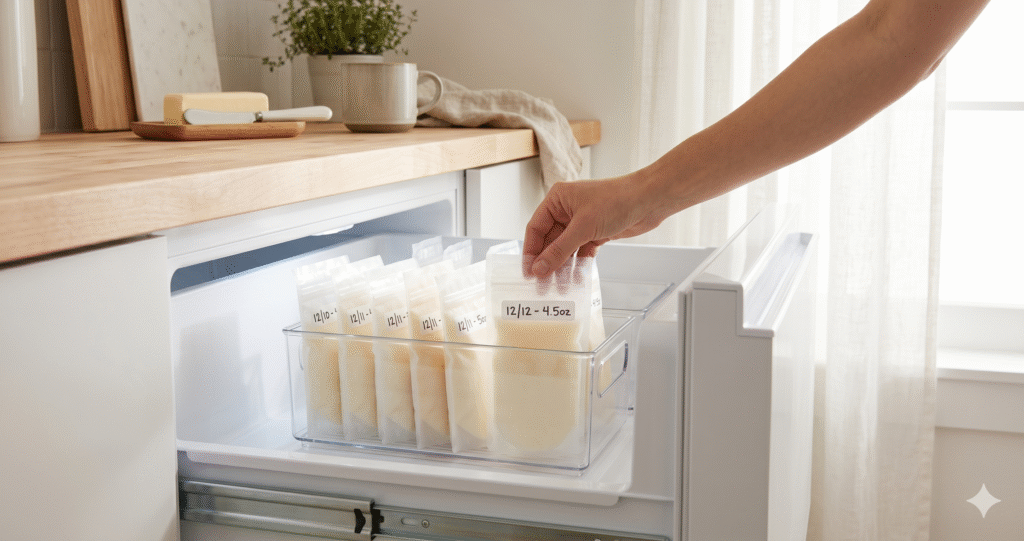
- Store — label with date, choose fridge or freezer based on when baby will drink it, put it in the back of the unit (not the door).
- Thaw — move frozen milk to the fridge the night before, or run the sealed container under warm water.
- Warm — optional, but if you do, use warm water and never a microwave.
- Feed — within two hours of the milk reaching room temp.
The guidelines below tell you exactly how long milk stays safe at each step. Bookmark this page or save the printable chart below — you will forget the numbers at 2 AM.
Breast Milk Storage Times (CDC Guidelines at a Glance)
These numbers come straight from the CDC’s breast milk storage guidelines, which in turn reflect the Academy of Breastfeeding Medicine’s Clinical Protocol #8. They apply to healthy, full-term infants; if your baby was premature or is hospitalized, ask your lactation consultant or pediatrician for stricter rules.
| Storage Location | Freshly Pumped | Thawed (Previously Frozen) |
|---|---|---|
| Countertop (up to 77°F / 25°C) |
Up to 4 hours | 1–2 hours |
| Insulated cooler with ice pack | Up to 24 hours | Not recommended |
| Refrigerator (40°F / 4°C or colder) |
Up to 4 days | Up to 24 hours |
| Freezer (0°F / -18°C or colder) |
6 months is best, up to 12 months is acceptable | Never refreeze |
The one rule that surprises most moms: thawed milk’s clock starts the moment it’s fully liquid, not when you take it out of the freezer. If you moved a bag to the fridge Monday night and it finished thawing Tuesday morning, you have until Wednesday morning to use it.
A few more rules worth tattooing somewhere
- Never refreeze milk once it’s fully thawed. If a frozen bag still has ice crystals, you can put it back.
- Freeze in small portions (2–4 oz is the sweet spot). Thawed milk can’t be refrozen, so big portions waste liquid gold when baby isn’t hungry.
- Leave an inch of headroom in any container you’re freezing. Milk expands, and a stuffed-full bag will split along the seam.
- Always store in the back of the fridge or freezer, never in the door. Temperature swings from opening and closing shorten shelf life.
- Label every container with the date pumped (and baby’s name if it’s going to daycare).
Breast Milk Storage Bags vs. Bottles: What to Actually Use
A lot of pumping parents end up with a mix. Bottles are great for the fridge and for milk you’ll use within a day or two. Bags are the workhorses of the freezer stash because they lie flat, stack densely, and cost a fraction of what bottles do per ounce. For a deep dive on picking feeding bottles, see our best baby bottles roundup — several of the bottles on that list double as short-term storage.
For storage bags specifically, the category is noisy. After testing a handful myself and cross-referencing what lactation consultants and long-running pumping blogs recommend in 2026, these five cover every realistic use case without overlap.
Best Overall & Most Affordable: Lansinoh Breastmilk Storage Bags
~$15–20 for 100 count · Available on Amazon, Target, Walmart
Lansinoh is the bag every lactation consultant in America has been handing out for decades. The current version is noticeably better than the one I used with my daughter. The double zipper now changes color when it’s fully sealed — you can actually see and hear the click. The side seams are reinforced, and the teapot-style spout means you can pour one-handed without spilling down your wrist. With a Lansinoh pump-into-bag adapter (sold separately for about seven dollars), they also attach directly to most major pump brands.
The honest caveat: the plastic feels thinner than NUK or Medela. In seven years of using these on and off, I’ve had exactly one leak, and it was a zipper I didn’t fully seal. But if you’re the anxious type who’ll sleep better with extra plastic, scroll down to NUK.
Best Leak-Proof: NUK Simply Natural Seal n’ Go
~$14–17 for 100 count · Amazon, Walmart, Target
If you’ve ever opened a cooler bag to find pink-tinged milk pooling at the bottom, these are for you. NUK’s Seal n’ Go bags have a gusset-free bottom (one of the most common leak points on other brands), a double zipper that the brand claims is 100% leak-proof, and a gravity-fed pour spout that actually works. Milk + Honey, a breast milk keepsake company, has handled over 20,000 customer bags in seven years. They independently ranked NUK as the most reliable bag they’ve ever received in the mail. That’s about as real-world a stress test as storage bags get.
The trade-off: NUK bags aren’t designed to attach to a pump. You have to pump into a bottle first, then pour into the bag. If you pump at work and need to minimize parts to wash, Kiinde or Lansinoh save you a step. If you’re mostly building a freezer stash and want zero leaks, these win.
Best Pump-to-Feed System: Kiinde Twist Pouch
~$20 for 40 count · Also at Target, Macy’s, Babylist
Kiinde is the only major brand that replaced the zipper with a threaded twist-lock cap. Once you use one, a zipper bag feels like a paper napkin. The whole system is built around one idea: the same pouch pumps, stores, warms, and feeds. You pump directly into the pouch using a universal adapter that fits Medela, Spectra, Lansinoh, Ameda, and Avent. It stores, stacks, and freezes like any pouch. When it’s time to feed, you snap it into a Kiinde Squeeze feeding bottle and your baby drinks directly from it. Fewer parts to wash at midnight is a real quality-of-life upgrade when you’re running on three hours of sleep.
Where it doesn’t shine: Kiinde pouches are round-bottomed, so they don’t lie flat in the freezer. They’re also about two to three times the per-bag cost of Lansinoh, which makes them impractical for building a big freezer stash. And to get the full pump-to-feed workflow, you need the adapters and the Squeeze bottle, which adds up. If you pump twice a day and feed fresh, Kiinde is worth every cent. If you’re stockpiling for back-to-work, pair it with cheaper freezer bags.
Best for Building a Freezer Stash: Nanobébé Breastmilk Storage Bags
~$24 for 50 count refill · Organizer sold separately (~$20) · Amazon, Target
If you’re the mom who’s been secretly researching “first in, first out freezer systems” at 4 AM, Nanobébé was designed for you. The bags are thin and flat by design. This means milk cools and thaws about twice as fast as a thicker bag, which matters because slower cooling means more nutrient degradation. Paired with their vertical organizer, the bags slot in like index cards so you always grab the oldest milk first. No more digging through a ziplock avalanche in the back of your freezer. The system is the whole selling point.
What to know going in: each bag only holds 5 oz (versus 6 oz on Lansinoh and NUK), which is fine for most feedings but annoying if you’re an oversupplier. The shape is also a little unusual, and pouring takes practice. And to actually get the freezer-Tetris benefit you pretty much need to buy the organizer too. If you’re exclusively pumping or stashing a year’s worth of milk before returning to work, this is the most organized option on the market.
Best Reusable Option: Momcozy Silicone Storage Bags
~$18–30 for a 5-pack · Amazon, Walmart
If throwing away 10+ plastic bags a day has started to weigh on you, reusable silicone bags are the tidy eco-answer. Momcozy’s version is one-piece molded food-grade silicone (no seams to break), holds 8.5 oz per bag (more than any disposable), and has a screw-on knob cap instead of a zipper. They’re dishwasher safe, freezer safe, microwave safe, and boil-safe for sterilizing. After breastfeeding, you can keep using them for baby purées, snacks, smoothies — they have a real second life.
The honest math: five silicone bags cost about the same as 100 Lansinoh bags, and for a working mom who needs to send 4–6 bottles’ worth of milk to daycare every day, five isn’t enough rotation. Most people who go reusable either buy two or three five-packs, or use them only for overnight fridge storage and stick with disposables for the freezer stash. The other catch: fill them carefully — the brand’s own instructions warn that going past 250 ml can split the bag during freezing.
Can You Combine Pumping Sessions?
Yes, with one rule that matters a lot: cool fresh milk to fridge temperature before adding it to already-cooled or frozen milk. Adding body-temperature milk to a cold bag partially re-warms the old milk, which restarts its decline. In practice, this means you pump, chill the fresh bottle thoroughly in the fridge, then combine.
If you’re combining milk pumped on different days, label the combined bag with the date of the oldest milk, and count storage time from there. So if you add Tuesday’s ounce to Monday’s four ounces, that bag is “Monday’s milk” and follows the four-day fridge rule starting from Monday.
Daycare tip: most daycare providers prefer single-session bottles so they can mix and match to fit your baby’s appetite. Combining is mostly a freezer-stash play, not a daily pumping one.
How to Freeze (and Thaw) Breast Milk the Right Way
Freezing
- Freeze in 2–4 oz portions. Thawed milk can’t be refrozen, so a 6 oz portion that baby rejects is a real loss.
- Lay bags flat for the first few hours, then stand them up once frozen solid — you’ll fit three times as many in the same drawer.
- A standalone deep freezer (not the one attached to your fridge) holds 0°F more consistently because the door gets opened less. If you have one, store long-term stash there.
- Freeze milk within four days of pumping. If you don’t think you’ll use a bag in that window, freeze it the same day you pump. Freezing sooner preserves more nutrients.
Thawing
Two methods:
- Overnight in the fridge (best). Move tomorrow’s bag to the back of the fridge tonight. It’ll be fully thawed by morning and has a 24-hour clock from that point.
- Warm running water or a warm-water bath. Holding the sealed bag under warm (not hot) tap water thaws milk in about 10 minutes. This is the “I forgot to move a bag” rescue.
What you must not do: thaw in a microwave, thaw on a stovetop, or leave a bag thawing on the counter all day and then stick it back in the freezer. Microwaves create hot spots that can scald your baby’s mouth and destroy immune proteins in the milk.
Warming Breast Milk Without Destroying the Nutrients
Breast milk does not have to be warm. Plenty of babies drink it cool or at room temperature, and if yours is one of them, congratulations, you’ve been handed a superpower. Skip this section.
If your baby prefers warm milk (most do once they’ve had warm milk even once), the safe method is a warm water bath:
- Keep the milk sealed in its bag or bottle.
- Place it in a bowl of warm — not hot — tap water for a few minutes, or hold it under warm running water.
- Swirl (don’t shake) to remix the fat, which naturally separates while stored.
- Test on your wrist. Milk should feel warm, not hot. If it’s hot enough to feel warm against your skin, it’s too hot for baby.
A dedicated bottle warmer is worth it if you’re warming multiple bottles a day. Most keep temperatures below the nutrient-damaging threshold automatically, which is hard to do reliably with a bowl of water when you’re sleep-deprived. We cover the picks in our best bottle warmers guide.
Feeding the Stored Milk (Without Wasting It)
Stored milk is also how partners get to take a night feed while you actually sleep — which, for a lot of households, is the whole reason anyone started pumping. Once you’ve thawed, warmed, and handed off a bottle, the clock is ticking:
- Room-temperature milk (thawed or warmed): use within 2 hours.
- Leftover in a bottle after baby starts drinking: the CDC recommends using within 2 hours or discarding. Baby’s saliva introduces bacteria that can multiply in a half-drunk bottle.
If your baby is breastfed and transitioning between breast and bottle, consider using paced bottle feeding, which mimics the pace and control of nursing. This is especially helpful with stored milk because it reduces overfeeding (bottles flow faster than breasts, and stored milk is finite and precious).
Want a printable version of the storage chart?
Get our free Newborn Essentials Kit — includes a one-page breast milk storage cheat sheet you can stick on the fridge, plus a first-six-weeks survival guide and a pediatrician question list. No spam, just the PDFs.
Sign up below to download.
Weird Smells, Soapy Taste, and Other Panic Moments
“My thawed milk smells sour or soapy. Is it spoiled?”
Probably not. This is almost always excess lipase, a completely harmless enzyme that lives in some mothers’ milk at higher levels than others. Lipase breaks down fat in stored milk over time, creating fatty acids that smell soapy, metallic, or even slightly rancid. The milk is still nutritious and safe, but some babies refuse the taste.
According to the AAP’s milk storage guidelines, you can test for high lipase by freezing a small bag for a few days, thawing it, and sniffing. If it smells off, you have two options. First, you can scald milk before freezing going forward: heat to about 180°F / 82°C for about a minute, then cool and freeze. This deactivates lipase, though it also reduces some antibodies. Second, you can mix soapy-smelling milk with fresh milk to mask the taste. Milk that’s actually spoiled tastes obviously sour, often with visible chunks or separation that doesn’t swirl back together.
“The fat separated into a layer on top. Is that normal?”
Completely normal. Breast milk isn’t homogenized the way store-bought cow’s milk is, so the fat naturally rises. A gentle swirl (not a shake) reincorporates it. More recent research suggests gentle shaking is less damaging to antibodies than older advice claimed, but swirling remains the standard recommendation and it’s a gentler habit to build.
“My milk changed color. Did something go wrong?”
Usually no. Breast milk can shift from bluish to yellow to creamy depending on what you ate, how long after a feed you pumped (foremilk is thinner, hindmilk is fattier), and how long it’s been stored. Pink or red milk is usually a cracked nipple and still safe to feed. Brown or orange milk (sometimes called “rusty pipe syndrome”) in the first weeks postpartum is also harmless.
Storing Milk On the Go: Work, Travel, and Daycare
The CDC says an insulated cooler with ice packs keeps milk safe at 40°F or below for up to 24 hours. For plenty of pumping parents, a basic cooler bag with two frozen gel packs gets the job done — throw fresh bottles in, and refrigerate or freeze as soon as you arrive home.
For traveling moms, wearable-pump moms, or anyone commuting more than 30 minutes, a dedicated breast milk chiller is a genuine upgrade. Instead of re-freezing ice packs every single day, you use ice cubes — which are available literally everywhere — and get far longer safe storage.
Best On-the-Go Chiller: Ceres Chill OG
~$55–70 from Amazon or cereschill.com · FSA/HSA eligible
The Ceres Chill OG is a double-walled stainless steel chiller with a dual-chamber design. You fill the inner chamber with ice, pump directly into the outer chamber, and your milk stays at safe temperatures for up to 20 hours. No refreezing ice packs, no bulky cooler, and it’s TSA-approved so it travels. It holds up to 27 oz using the dual chamber, or 34 oz if you use just the outer chamber with no ice (for already-cold milk). There’s also a warmer mode: fill the outer chamber with hot tap water, drop a cold bottle into the inner chamber, wait about 10 minutes, and you’ve got a warmed feed without needing a bottle warmer.
After breastfeeding, it becomes a water bottle, a thermos, a popsicle-to-the-park carrier. Lifetime warranty from the company.
If $70 feels steep, the Boon Frosh is a newer $35 competitor with a similar dual-chamber design. It holds about half as much (14 oz max), doesn’t work as a warmer, and has a shorter chill time (about 17 hours), but it’ll fit a cup holder and costs half as much. A certified lactation counselor’s side-by-side test found the Boon actually cools small volumes (under 4 oz) faster than the Ceres because the inner chamber sits closer to the outer milk chamber. For occasional use, Boon is plenty. For daily work pumping or travel, Ceres wins on capacity and versatility.
What to Do When Things Go Sideways
Power outage
Keep the fridge and freezer doors closed. According to the CDC, a full freezer left unopened holds safe temperatures for about 48 hours, a half-full one for about 24, and a fridge for about 4 hours. When power returns, check each bag: if it still has ice crystals, refreezing is fine. If it’s fully thawed but still cold, move it to the fridge and use within 24 hours. If it’s warm, discard it — this is gutting but non-negotiable for baby safety.
Forgot a bottle on the counter
If it’s been under 4 hours since you pumped it, it’s fine to refrigerate. Over 4 hours (or if the room was hot), toss it. This one hurts, and it happens to everyone eventually.
Baby didn’t finish the bottle
The CDC’s official guidance is to use within 2 hours or discard. Many lactation consultants extend this slightly in practice for a baby who has a cold and isn’t nursing or bottle-feeding well, but the rule exists because baby’s saliva introduces bacteria that multiply at room temp.
You bought the wrong storage bags
If you ended up with zipper-top sandwich bags or thin plastic food storage bags, return them and buy a dedicated breast milk bag. Household plastic bags are neither sterile nor built to handle freezing liquid expansion — the CDC specifically warns against them.
The Rules That Matter Most
A lot of the anxiety around breast milk storage comes from conflicting advice and the sheer volume of decisions a new parent is making in a day. The actual rules are short: 4 hours on the counter, 4 days in the fridge, 6 months in the freezer (up to 12), and never refreeze. Use dedicated bags or bottles. Store in the back, not the door. Label the date. Cool before combining. Thaw in the fridge or under warm water, never in a microwave.
Everything else is optimization. Start with Lansinoh or NUK if you’re building a basic stash. Add a Ceres Chill if you’re going back to work. Add Nanobébé’s organizer if your freezer is a disaster. The milk you pumped is precious because you made it — but it’s also just food, and food has rules that are simpler than they look at 2 AM.