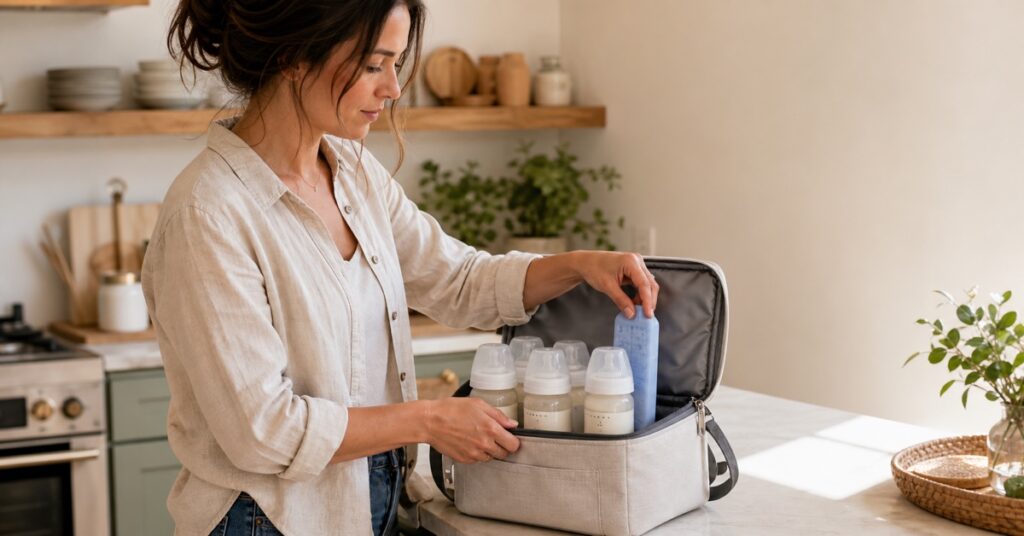
At 7:38 a.m., the bottles are cold, but one is missing the date. The ice pack is still in the freezer. And you cannot remember whether the teacher stores the whole cooler or takes the bottles out.
If you are working out how to pack bottles for daycare, the fix is not a bigger bag. It is a repeatable system: check the daycare policy, prepare the milk safely, use two kinds of labels, keep cold bottles cold on the way, and reset everything that evening.
Ask for the center’s written bottle rules before buying anything. Label every bottle with the information they require, pack already chilled bottles in a closed insulated bag with a frozen cold pack, and hand them directly to staff for refrigeration. A lunch bag you already own is perfectly fine if it fits your assembled bottles, closes fully, stays upright, and meets the center’s storage rules.
This guide covers breast milk, formula, and combination-feeding days. Your daycare’s written policy, your state’s licensing rules, the formula label, and your child’s clinician should always outrank a general packing routine.
Before You Buy Anything, Ask These Eight Questions
Daycare bottle rules vary more than most new parents expect. Maryland, for example, requires food and bottles for children younger than 18 months to be labeled with the child’s name and date. Washington’s breast-milk rule calls for the child’s first and last name plus the date received. Those are examples, not a national template.
- Do you require fully prepared bottles, or may staff mix formula or portion milk on site?
- What must appear on every bottle: full name, date, contents, amount, preparation time, or expressed date?
- Do the cap, collar, or other removable pieces need a separate name label?
- Do you accept thawed breast milk or a frozen backup? If yes, how should it be marked?
- Should I send one bottle per feeding, and do you want an extra bottle?
- Will staff remove the bottles and refrigerate them, or store the entire cooler? Is there a size limit?
- What happens to unused milk and partially used bottles at pickup?
- Do you rinse bottles, close them as-is, or place them in a separate return bag?
Get the answers in writing if you can. They determine the label, bottle count, cooler size, and morning routine. They also prevent a well-meaning parent from relying on a system the center cannot accept.
The Five-Part Daycare Bottle System
| Step | What you need to do | What you may need | When to skip a purchase |
|---|---|---|---|
| Policy | Confirm preparation, labels, bottle count, refrigeration, and returns. | Nothing | Never skip the policy check. |
| Prep | Use clean bottles and prepare milk according to the correct safety rules. | Enough bottles for the day and home rotation | Use your current bottles if the daily wash-and-dry cycle works. |
| Label | Keep the permanent name separate from changing daily information. | A durable name label plus removable daily label | Use center-provided labels or approved writable tape if they work reliably. |
| Cold transport | Pack chilled bottles with a frozen cold pack and close the bag fully. | An insulated bag and cold pack that fit together | Use your existing insulated lunch bag if it passes the fit check below. |
| Return and reset | Keep used or leaking bottles separate, then clean and air-dry everything. | A washable outer return pouch | Use the center’s return system if it closes reliably and stays away from food and diapers. |
One Product Worth Adding—and What to Reuse
Most families do not need a three-item shopping list. Start with the insulated bag and labels you already have. If the missing piece is a slim, reusable cold source, this is the exact option that passed the product checks for this guide.
Fit & Fresh Cool Coolers XL Slim 4-Pack
Each hard pack in the Clear Blue set is about 7 by 4.75 by 0.5 inches—useful when your washable insulated bag already fits the bottles.
- Best for: a roomy bag that can hold the frozen pack or packs without pushing bottles sideways.
- Skip it if: the bag’s usable interior is smaller than the pack or the hard edges crowd bottle caps and valves.
- Tradeoff: a thin pack saves space but does not prove a 24-hour hold. Freeze it overnight and refrigerate bottles after handoff.
If your current bag passes the fit check, buy only the missing cold source. Already have one? Buy nothing for transport. For a permanent name layer, use the daycare label guide instead of buying a label that may not match your bottle surface or wash routine.
Use Two Labels, Not One Overworked Label
A bottle carries two different kinds of information. Your child’s name is usually permanent. The date, contents, amount, and preparation details can change every day or every bottle. Trying to force both jobs onto one tiny sticker creates more rewriting and more chances to miss something.
Layer 1Permanent identity: your child’s name in the exact format the center requires. Put it on a hard, appropriate surface where it can survive your normal cleaning routine.
Layer 2Daily information: the date and any content, amount, expressed-date, prepared-time, thawed, backup, or feeding-order notes required by the center. Use their label, a removable label, or approved writable tape.
CONTENTS: [breast milk / formula / center-approved milk]
AMOUNT: [if required]
DATE SENT OR PREPARED: [if required]
EXPRESSED DATE: [breast milk, if required]
SPECIAL NOTE: [thawed / backup / feeding order, only if requested]
For a combination-feeding day, label each bottle for what is actually inside it. Color can make bottles easier to spot, but color alone cannot replace readable words.
Apply the daily label to a clean, dry surface before the bottle develops condensation. Keep labels away from measurement marks, cap threads, sealing edges, nipples, vents, valves, and printed warnings. Remove any label that curls, tears, or can become a loose piece.
The label guide above compares permanent options by bottle material and cleaning routine. This article stays focused on the daily system rather than repeating that product comparison.
Do the Cooler Fit Check With Your Actual Bottles
“Holds six bottles” is not enough information. A tall bottle with the nipple, collar, and protective cap installed may not fit the same way as a shorter bottle body shown in a product photo. A thick cold pack can also take the space you thought belonged to the final bottle.
- Measure the tallest fully assembled bottle. Include the nipple cover or travel cap you will send to daycare.
- Use your real daily bottle count. If the center wants one bottle per feeding plus a backup, test that exact load.
- Add the frozen cold pack before judging capacity. The bag still needs to close without forcing the zipper.
- Check the daycare storage footprint. Ask whether the whole bag goes into a refrigerator or only the bottles do.
- Lift and gently tip the closed bag. Bottles should stay upright instead of falling into each other.
- Inspect the cleanup path. The lining should be reachable, wipeable, and able to dry fully overnight.
Essential: a closed insulated bag plus a frozen cold pack when you are transporting chilled milk. Useful: a permanent name label and a separate washable return pouch. Optional: color coding, dividers, or a dedicated bottle-only cooler.
Already own a lunch bag that holds the bottles upright, closes with the cold pack inside, cleans easily, and fits the daycare refrigerator? Use it. A special bottle bag is not automatically safer.
Night-Before Bottle Prep
For breast milk
Wash your hands and work with clean bottles and parts. Follow your usual milk-storage rotation, portion the amount agreed on with your caregiver, and label the container with the expressed date and your child’s name. The CDC’s breast milk guidance also tells parents to ask the childcare provider about any additional labeling and storage requirements.
Keep prepared bottles cold in the refrigerator, not in the door. If you need the complete storage timeline for fresh, refrigerated, frozen, and thawed milk, use the full breast milk storage chart rather than trying to memorize it from a packing checklist.
For formula
First confirm whether the center wants ready-to-feed formula, prepared bottles, or supplies for on-site preparation. Follow the directions on the formula container exactly. For powdered formula, measure the water first and then add the powder. Do not dilute or concentrate formula to make daycare packing easier.
The CDC’s formula guidance says prepared formula should be used within two hours of preparation and within one hour from the start of feeding. If feeding will not begin within two hours, refrigerate it immediately and use it within 24 hours. Your center may set a stricter rule. The formula preparation and storage guide covers the broader routine.
Babies younger than 2 months, babies born prematurely, and babies with weakened immune systems need extra protection when powdered formula is prepared. Follow the current CDC instructions, the formula label, and your child’s clinician rather than using a one-size-fits-all daycare shortcut.
Finish the setup
- Complete the daily labels while the bottle surfaces are dry.
- Freeze the cold pack according to its instructions.
- Leave the empty insulated bag clean, dry, and open to air unless its manufacturer instructs otherwise.
- Put written feeding instructions where the teacher expects them.
- Count your clean bottle rotation. If evenings are becoming impossible, this guide can help you decide how many baby bottles you actually need.
The Morning Pack: Cold, Upright, and Ready to Hand Off
- Take the already chilled bottles from the refrigerator.
- Check that each bottle is closed correctly and that nipples have protective covers if required.
- Place the frozen cold pack in the insulated bag, then load the bottles in the arrangement you tested.
- Confirm the labels are readable and match the day’s contents.
- Close the zipper completely and avoid reopening the bag during the trip.
- At daycare, hand the bottles directly to staff for storage under the center’s policy.
The CDC says breast milk can be transported in an insulated cooler with frozen ice packs for up to 24 hours, then used, refrigerated, or frozen at the destination. That is a public-health storage guideline under the stated conditions. It is not proof that any particular bag keeps every load at a safe temperature for 24 hours. For a daycare commute, the goal is a short, closed cold handoff followed by prompt refrigeration.
Do not treat a cooler as a refrigerator or use it to rescue milk that has already exceeded its time or temperature limit. For freshly expressed milk, follow the current CDC guidance and the center’s policy. For prepared formula, follow the two-hour rule and refrigerate it immediately when it will not be used within that window.
The 20-Second Drop-Off Check
- Count the bottles with the teacher.
- Confirm your child’s name and today’s required date.
- Identify breast milk, formula, thawed milk, or a backup bottle when relevant.
- Point out any written feeding instruction.
- Confirm staff has taken responsibility for refrigeration.
- Ask how the cooler, cold pack, unused milk, and used bottles will come home.
This tiny pause protects the whole system. A perfectly packed cooler does not help if it sits unnoticed in a cubby.
The After-Daycare Reset
Treat every returned bottle according to its status, not simply by whether it still feels cool. An unopened bottle, a thawed bottle, and a bottle your baby drank from do not share the same clock. Follow the center’s record and the stricter applicable rule.
- Formula left after feeding: discard it within one hour from the start of feeding. Do not refrigerate it for later.
- Breast milk left after feeding: the CDC says to use it within two hours after the baby finishes, then discard it. Your daycare may discard it sooner.
- Unused or thawed milk: confirm when it left storage, whether it was warmed, and what the center’s written return policy requires before deciding what to keep.
Keep used or leaking bottles inside a closed, washable outer pouch. The FDA warns against putting dirty diapers in the same bag with bottles or food because bacteria can spread to the food. A return pouch helps with separation, but it does not turn used milk into safe milk or replace cold storage.
At home, take every bottle apart and clean the feeding items after each feeding. When washing by hand, the CDC recommends using a clean basin reserved for feeding items instead of setting the parts directly in the sink.
Rinse well and let everything air-dry fully. Do not rub parts dry with a dish towel. Babies younger than 2 months, babies born prematurely, and babies with weakened immune systems need their feeding items sanitized every day.
Wipe the cooler and cold pack, check seams and closures, and let the bag dry completely. Return the cold pack to the freezer. Then replace only the part of the system you used up: clean bottles, a daily label, or a fresh return pouch.
Common Failure Points—and the Quick Fix
| Problem | Why it happens | What to do |
|---|---|---|
| The daily label slides off. | It was applied over condensation. | Label a clean, dry surface before refrigeration and use the center-approved material. |
| The cooler closes only if bottles lie sideways. | Capacity was judged without caps or the cold pack. | Measure the assembled bottle and test the complete load. Use a better-fitting bag. |
| A backup bottle gets used first. | Its status is shown only by color or position. | Add the word “BACKUP” if the center requests it and confirm it at handoff. |
| No one knows whether staff will mix formula. | The family packed from habit instead of written policy. | Stop guessing. Ask what forms of formula the center accepts and who prepares each bottle. |
| A used bottle leaks into the daycare bag. | The bottle was returned loose or not fully closed. | Use a separate washable outer pouch, then clean and dry the bag that evening. |
Daycare Bottle Packing FAQ
Do I need a cooler for a ten-minute drive?
Do not decide by drive time alone. Ask how the center expects chilled bottles to arrive and when staff refrigerates them. A small insulated bag with a frozen cold pack keeps the handoff simple; it does not need to be a specialized bottle cooler if your current bag passes the fit check.
Exactly what should I write on a daycare bottle label?
There is no single U.S. answer. Start with your child’s name, then follow the center’s written requirements for the date, contents, amount, expressed date, prepared time, thawed status, or backup status. Treat every bottle as needing its own clear label until the center tells you otherwise.
Can I send frozen breast milk to daycare?
Only if the center accepts it and can store and thaw it under the applicable rules. The CDC advises labeling breast milk for childcare with the child’s name and expressed date. Ask whether the center wants frozen bags, prepared bottles, or one frozen backup, and how unused thawed milk will be documented and returned.
Can the same cooler bring used bottles home?
Yes, if the center closes returned bottles and you isolate anything used or leaking in a washable outer pouch. Do not pack dirty bottles loose beside food, and clean any cooler that gets milk inside it. Traveling home with a cold pack does not make leftover milk reusable.
If bottles are only one part of a much bigger first-week scramble, the starting-daycare survival guide covers clothes, drop-off, communication, and the rest of the setup.
The system is policy first, two label layers, one cold handoff, and one evening reset. Fix those four pieces, and you stop solving the same bottle puzzle every morning.