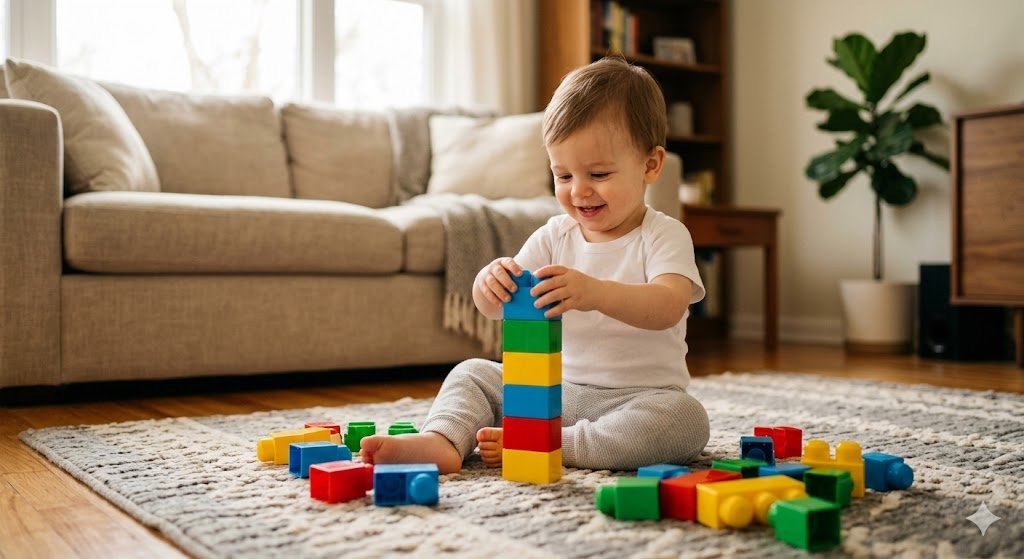
Blog

  • Must-Have Toys for 0–3 Months

    Baby Toys 0–3 Months: Best Developmental Essentials for Newborns

    Choosing the right baby toys 0–3 months supports early sensory, motor, and cognitive development. With a few safe, simple items—and lots of loving interaction—you can make the first three months calm and engaging.

    Best Baby Toys 0–3 Months for Early Development

    Newborns see best at 8–12 inches and respond strongly to high-contrast patterns, gentle motion, and soft sounds. These baby toys 0–3 months are ideal starters:

    • High-contrast flash cards / soft cloth books – bold shapes help visual focus and tracking.
    • Soft rattles – light sound + easy grasping encourage early cause-and-effect.
    • Crib mobile – slow, gentle movement invites calm attention before sleep.
    • Baby mirror – babies love faces; safe mirrors spark curiosity.
    • Baby play mat – a comfy base for tummy time and motor practice.
    baby toys 0–3 months high-contrast flash card shown to a swaddled newborn by a parent; visual stimulation for early development
    High-contrast cards are perfect for newborn focus and early visual tracking.

    High-Contrast Cards or Soft Cloth Books

    Why this works: Newborn vision favors bold, simple shapes. High-contrast patterns are the easiest to “lock onto,” strengthening focus and visual pathways.
    How to use: Hold cards 8–12 inches from baby’s face during awake time or prop one during tummy time. Rotate a few patterns to keep it fresh.

    Choose non-toxic inks and soft, rounded edges. Cloth books should be washable and colorfast.

    Soft Rattles

    Why this works: Gentle sound paired with movement builds cause-and-effect understanding and invites early grasping practice without overwhelming baby.
    How to use: Shake once or twice, pause, and wait for baby to look back. Wrist rattles help babies “find” the sound source earlier.

    Crib Mobile (with Gentle Music or Motion)

    Why this works: Slow, predictable motion supports visual tracking and lengthens calm focus—useful before naps and bedtime.
    How to use: Keep out of reach; limit to 10–15 minutes to avoid overstimulation. Remove once baby can push up or sit.

    For nursery safety basics, see this concise NHS overview.

    crib mobile baby toy for 0–3 month old infants; neutral plush animal mobile hanging safely above a crib
    Gentle motion + soft shapes = calm attention and early tracking.

    Baby Mirror

    Why this works: Babies are drawn to faces. A safe mirror boosts visual focus and early social awareness (expressions, turn-taking).
    How to use: Place a tummy-time mirror on the play mat; sit face-to-face and talk about what baby “sees.”

    Baby Play Mat

    Why this works: A stable, cushioned surface encourages tummy time, building neck, shoulder, and core strength needed for rolling and crawling later.
    How to use: Start with 2–3 minutes several times daily; add a high-contrast card within view to extend interest.

    How to Play: Tiny Routines That Work

    • Tummy time: start with 2–3 minutes, a few times daily; prop a high-contrast card within view. Helpful pediatric tips on tummy time.
    • Mobile moments: 10–15 minutes before sleep to cue wind-down—avoid overstimulation.
    • Sound play: shake a soft rattle, then pause; let baby process and look back.
    • Texture time: offer a crinkle toy or comfort cloth; narrate what baby feels.

    Your voice is the “best toy.” Short, calm narration of what baby is seeing or hearing boosts bonding and language foundations.

    Safety Notes

    • Check for choking hazards: no small detachable parts; seams secure; materials non-toxic and washable.
    • Mobiles must remain out of reach; remove as soon as baby can push up or sit.
    • Avoid overstimulation—dim lights, soften sounds, and keep sessions short.

    For age-appropriate toy advice, see the American Academy of Pediatrics’ toy guidance, and CDC infant milestones here.

    Optional (Soon): Toys for 3–6 Months

    Why these later: Once grasping improves and teething begins, these become genuinely useful. Preparing early is convenient, but they are not essential for 0–3 months.
    • Sensory ball – textured surfaces invite grasping and hand–eye coordination (often 3–6 months).
    • Teething ring – typically helpful after 4–6 months when teething discomfort starts.

    Conclusion: A Calm Start with Baby Toys 0–3 Months

    A handful of safe, simple baby toys 0–3 months—plus your voice and eye contact—are all your newborn needs. Keep play gentle, rotate a few favorites, and enjoy tiny milestones. For smoother days and nights, try our Gentle Newborn Sleep Schedule, and if you’re still prepping for baby, see the Newborn Must-Haves Checklist.

    baby toys 0–3 months essential set: high-contrast cards, soft rattles, lovey blanket, crib mobile, and soft books summarized
    One-glance recap of simple, sensory-rich toys for the first three months.

    This article is for informational purposes only and isn’t a substitute for personalized medical advice from your pediatrician.

  • Foods to Avoid During Pregnancy

    Foods to Avoid During Pregnancy (and Safe Alternatives)
    Medical disclaimer: This guide is for general education and is not medical advice. For personal questions, consult your clinician.

    Pregnancy food safety doesn’t mean memorizing a hundred rules. Choose pasteurized, cook thoroughly, watch time and temperature, and swap risky items for safer versions.

    Here’s a calm, practical checklist you can skim anytime: quick rules, what to avoid, easy safe swaps, and a short FAQ.

    Why Food Safety Matters

    Pregnancy increases sensitivity to some germs (like Listeria) and contaminants (like mercury). Smart choices reduce foodborne illness risk and support baby’s development. For a simple overview, see public-health pregnancy food safety advice.

    The Golden Rules (Quick)

    • Pasteurized only for milk, cheese, and juices (check the label).
    • Cook thoroughly: poultry 74 °C/165 °F; ground meats 71 °C/160 °F; steaks/roasts 63 °C/145 °F + 3-min rest; eggs until yolks/whites are firm.
    • Reheat to steaming leftovers, deli meats, hot dogs, and refrigerated smoked fish.
    • Time & temp: fridge ≤4 °C/40 °F; freezer ≤−18 °C/0 °F; follow the 2-hour rule (≥32 °C/90 °F → 1 hour).
    • Clean & separate: wash produce; keep raw foods apart from ready-to-eat.
    healthy foods for pregnancy — colorful plate with fruits, vegetables, whole grains, dairy and proteins for a balanced prenatal diet

    High-Mercury Fish to Avoid (with Safer Choices)

    Avoid: shark, swordfish, king mackerel, tilefish (Gulf of Mexico), bigeye tuna, marlin, orange roughy. Choose low-mercury fish 2–3 servings/week (1 serving ≈ 113 g/4 oz cooked): salmon, sardines, trout, herring, anchovies, pollock, cod, haddock, tilapia, catfish, shrimp. Tuna tips: canned light tuna is lower in mercury; limit albacore/white tuna to 1 serving/week; avoid bigeye. See official mercury in fish recommendations.

    Raw/Undercooked Items

    • Raw or undercooked seafood/meat/eggs (sushi/sashimi, rare steak, runny yolks) → cook fully; use pasteurized eggs for sauces like mayo/aioli.
    • Refrigerated smoked seafood (lox, kippered, nova) → avoid unless cooked in a dish; canned/shelf-stable versions are fine.
    • Deli meats & hot dogs → reheat until steaming hot to reduce Listeria risk. See practical food safety guidance.

    Unpasteurized Dairy & Soft Cheeses

    Avoid unpasteurized milk/cheese. Soft cheeses are fine if made with pasteurized milk (check labels): feta, brie, camembert, queso fresco, blue-veined, etc.

    Pâtés, Spreads, Salads & Sprouts

    • Refrigerated pâtés/meat spreads → avoid; canned/shelf-stable are okay.
    • Pre-made deli salads (chicken/tuna/egg) → higher risk; make fresh at home.
    • Raw sprouts (alfalfa, clover, radish, mung bean) → avoid unless cooked thoroughly.

    Liver & High-Vitamin A Products

    Limit/avoid liver and high-retinol supplements (including some cod liver oils). Follow your prenatal vitamin as advised. For details, see evidence-based vitamin A in pregnancy guidance.

    Alcohol, Caffeine, Energy Drinks, Herbal Products

    • Alcohol: best to avoid.
    • Caffeine: keep to ≤ 200 mg/day (watch coffee size, tea/cola/cocoa). See clinician-reviewed caffeine guidance.
    • Energy drinks: avoid (high caffeine/other stimulants).
    • Herbal teas/supplements: use modestly; avoid strong/licorice-root blends or unverified products—when in doubt, ask your clinician.

    Juices, Buffets & Leftovers

    Choose pasteurized juices. Be cautious with buffets/foods held at room temp. Refrigerate leftovers within 2 hours (hot weather: 1 hour) and reheat to steaming before eating. Practical basics: cold storage times.

    Quick “Eat This Instead” List

    Swap ThisFor This
    Raw sushi, sashimi Cooked sushi (shrimp/crab/eel) or fully cooked salmon rolls
    Unpasteurized soft cheese Same cheese made with pasteurized milk (check label)
    Cold deli meats/hot dogs Reheat until steaming hot before eating
    Runny yolks, raw-egg sauces Fully cooked eggs, or sauces made with pasteurized eggs
    High-mercury fish Salmon, trout, sardines, cod/pollock, tilapia, shrimp
    Raw sprouts Stir-fried sprouts (cooked through)

    FAQ

    Can I eat sushi?

    Choose cooked sushi (shrimp/crab/eel) or fully cooked rolls; avoid raw fish/shellfish unless your clinician advises otherwise.

    Which cheeses are okay?

    Soft cheeses are fine if pasteurized (check the label). Avoid unpasteurized versions.

    How much coffee is safe?

    Keep total caffeine to about ≤ 200 mg/day and consider other sources (tea/cola/cocoa). If you’re sensitive, cut lower.

    I ate something risky—what now?

    Don’t panic. Watch for fever, vomiting/diarrhea, severe abdominal pain. If symptoms develop—or you’re worried—contact your clinician promptly.

    Medical disclaimer: The information here is for general educational purposes only and does not replace professional medical advice, diagnosis, or treatment. Recommendations can vary by location and health status—always follow your clinician’s guidance and local public-health advice (e.g., FDA/EPA/NHS). If you have urgent symptoms (fever ≥38 °C, persistent vomiting/diarrhea, severe abdominal pain, decreased fetal movement), contact your clinician or call your local emergency number immediately.
  • Breastfeeding Basics for New Moms: Latch, Supply, Hydration & Storage

    Breastfeeding Basics for New Moms: Latch, Supply, Hydration & Storage

    Those first feeds can feel nothing like the photos—messy, noisy, and new for both of you. That’s okay. Breastfeeding is a skill you and your baby learn together, and it gets easier quickly.

    Here’s a calm, practical guide you can skim at 3 a.m.: first, why breast milk is so good; then the few common snags and how to fix them; the tools that actually help; and a short FAQ.

    breastfeeding basics — close-up of a good cross-cradle latch with flanged lips and chin touching the breast

    Breast Milk: Why It’s So Good

    • Tailored nutrition: HMOs to feed good gut bacteria; whey-dominant proteins digest easily; fats shift within a feed/day to match needs.
    • Immune protection: secretory IgA, lactoferrin, lysozyme, and living cells help protect the gut.
    • Highly bioavailable micronutrients: iron and zinc are well absorbed despite modest amounts.
    • Bioactives & hormones support digestion and appetite regulation.
    • Dynamic: composition adapts with time of day, stage of lactation, and baby’s age.
    First-weeks reality check: most newborns feed 8–12×/24h, and it often takes 2–6 weeks to feel smooth—small adjustments matter.

    Common Challenges & How to Fix Them

    Sore nipples

    • Adjust latch/position: tummy-to-tummy, nose-to-nipple, wait for a wide-open mouth; bring baby to breast.
    • After feeds, apply a thin layer of purified lanolin (HPA/medical-grade) or a food-grade, fragrance-free nipple balm; many lanolin products don’t need wiping (check label).
    • Air-dry with a few drops of breast milk; brief cool compresses for comfort.

    Engorgement & plugged ducts

    • Keep milk moving: frequent, effective removal (baby or pump); breast compressions.
    • Warm before feeds, cold after; targeted massage toward the nipple.

    Worried about low supply

    • Early weeks target: 8–10 removals/day for the first 2–4 weeks.
    • Boost ideas: switch nursing, skin-to-skin, add one extra morning pump for several days if needed.
    • Hydration matters: keep water within reach at every feed; aim for pale-yellow urine. Over-drinking won’t raise supply by itself, but dehydration can reduce it.

    Mastitis (red flags)

    • Flu-like symptoms plus a hot, painful area. Keep milk moving, rest, hydrate, and contact your clinician promptly.

    Bottle (optional)

    • Not required unless separation/flexibility is needed. If used, choose slow-flow nipples and practice paced bottle feeding (upright hold, pauses every 20–30 ml, switch sides).
    • If a bottle replaces a breastfeed, pump 1:1 to protect supply; ensure pump flange size fits your nipple.
    When to get help: fewer than 6 wet diapers/day after day 5, poor weight gain, persistent nipple cracks/bleeding >48h, fever or worsening breast redness, or if feeds are painful despite re-latching.

    Breastfeeding Tools That Help

    • Nursing pillow — keeps tummy-to-tummy alignment and reduces back/shoulder strain.
    • Breast pump — manual or electric; choose the right flange size. Double electric for efficiency, manual for travel/light use.
    • Nursing pads — disposable or washable; change regularly to avoid irritation.
    • Nursing bras/tops — soft, stretchy, wire-free in early weeks; good fit prevents pressure points.
    • Bottles & slow-flow nipples (optional) — only if you need flexibility or separation; use paced bottle feeding.

    Quick starter kit

    1 nursing pillow, 2–3 nursing bras, 1–2 packs of pads, 1 pump with correct flange, and (if needed) 2 slow-flow bottles.

    Breastfeeding FAQ

    When will my milk “come in”?

    For many, day 2–5. Frequent, effective feeds help the transition.

    How long does a feed take?

    Newborns often take 10–30 minutes per side. Watch swallowing and relaxation, not the clock.

    breast milk storage guidelines — dated and labeled bottles in a refrigerator

    How do I store breast milk safely?

    Room temp (~25 °C): up to 4 h · Fridge (≤4 °C): up to 4 days (thawed: 24 h) · Freezer (≤−18 °C): 6–12 months (best by 6). Leftover after a feed: 2 h, then discard. See public health storage guidance and professional lactation resources for details.

    Which nipple cream is safe?

    Purified lanolin (HPA/medical-grade) or a food-grade, fragrance-free balm is commonly used; many lanolin products don’t need wiping before the next feed (check label). Fixing latch remains the #1 solution for pain.

    Can I have coffee or take medicines while breastfeeding?

    Moderate caffeine (~200–300 mg/day) is usually fine—watch your baby’s sensitivity. For medicines, consult your clinician and check a trusted lactation database.

    Bottom line: know why breast milk is worth it, fix the few common pain points early, lean on the right tools, and keep a simple FAQ handy. Small, early adjustments solve most problems.
  • Potty Training: A Practical Guide for Toddlers

    Potty Training: Step-by-Step Guide for Toddlers (18–36 Months)

    This potty training guide keeps things simple: know when to start, choose a method that fits your child, follow a clear daily routine, and handle accidents without power struggles.

    potty training toddler sitting on a potty chair, smiling, with a parent nearby—first steps for 18–36 month beginners.

    Potty Training Readiness Signs

    Most children are ready sometime between 18–30 months, but timing varies. Look for:

    • Stays dry for 2+ hours or wakes dry from naps
    • Regular bowel movements and shows awareness (hides, pauses, tells you)
    • Can pull pants up/down and follow 1–2 step directions
    • Shows interest in the toilet or copying adults/older siblings
    • Dislikes wet/dirty diapers and asks to be changed

    Both pediatric groups and national health services stress waiting for readiness and avoiding pressure—see the American Academy of Pediatrics (AAP) and the NHS potty training advice.

    What You’ll Need

    • Potty chair or seat reducer + step stool
    • Training pants or underwear (skip diapers during awake training hours)
    • Easy-off clothing (elastic waist), spare outfits, wet bag for outings
    • Toilet paper/flushable wipes, hand soap, paper towels
    • Rewards you approve (stickers, stamps, high-fives, little books)
    • Cleaning supplies for quick, calm accident clean-ups

    Choose a Method

    Child-Led (Gradual)

    Introduce the potty, read books, model the steps, and invite short sits after waking and meals. Great for laid-back timelines.

    3-Day (Intensive)

    Clear a long weekend, go pants-free at home, watch closely, prompt often, and celebrate successes. Keep expectations realistic; it often takes longer than three days to cement habits.

    Hybrid (Most Families)

    Start child-led, then add a focused weekend for momentum.

    Potty Training: Step-by-Step Routine

    1. Morning: Potty sit right after waking; switch to training pants.
    2. Daytime: Offer sits every 45–90 minutes and before/after outings; always before naps.
    3. Mealtime boost: Sit 10–20 minutes after meals (gastro-colic reflex helps).
    4. Evening: Potty → bath → PJs → final potty → bed.
    Tip: Keep sits short and positive (30–60 seconds). Praise effort, not just results.

    Sample Day Plan

    TimeWhat to doNotes
    7:00 Wake & potty sit Dry/wet? quick praise either way
    8:00 Breakfast Offer water; sit 10–20 min after
    9:30 Prompted potty sit Read a one-minute story
    12:00 Lunch Post-meal sit
    13:00 Nap prep potty sit Use diaper only for nap if needed
    15:30 After-nap potty sit Snack + water
    18:00 Dinner Post-meal sit
    19:30 Bath → potty → bed Calm, consistent routine

    Handling Accidents (Without Power Struggles)

    • Stay neutral: “Pee goes in the potty. Let’s clean and try again.”
    • Guide your child to help with simple cleanup—builds ownership.
    • Increase prompts or shorten intervals temporarily.
    • If resistance escalates, pause for 3–7 days and restart gently.

    Day vs. Night

    Day training and night dryness are different skills. Keep diapers for sleep until your child wakes dry for several mornings. Lift-and-pee is optional and not required.

    Poop Training & Constipation

    Many children withhold stools. Keep sits relaxed after meals, use a footrest for a squat-like position, offer fiber and water, and talk to your pediatrician if poop is hard or painful. A calm routine beats pressure.

    Rewards & Motivation

    • Use small, immediate rewards for sits/tries, not only successes
    • Privileges work well: choose the bedtime story, push the flush, pick underwear
    • Fade rewards as habits stick; keep praise specific (“You listened to your body!”)

    Hygiene & Independence

    • Teach wipe front to back; one wipe per pass
    • Hand-washing routine: wet, soap, scrub 20s, rinse, dry
    • Boys: start seated; introduce standing later with target stickers

    Potty Training FAQ

    When should we start potty training?

    When readiness signs show—often 18–30 months. Starting early without readiness usually drags out the process.

    How long will it take?

    Many children learn daytime skills in 1–3 weeks, with regressions during life changes. Nights often come later.

    What if my child refuses?

    Back off briefly, keep the potty positive, read potty books, and restart with tiny wins (sit fully clothed → underwear → bare bottom).

    Bottom line: Follow your child’s readiness, keep sessions short and positive, and be consistent. Calm repetition works better than pressure.
  • Baby’s First Foods: A Practical Guide for Parents

    Baby’s First Foods: When to Start Solids (6–12 Months Guide)

    Getting Started

    This baby’s first foods guide gives you a clear, step-by-step plan: when to begin, how to progress textures safely, what to avoid in the first year, and simple meal ideas.

    Baby

    When to Start Solids

    Most babies are ready around 6 months. Readiness signs include good head/neck control, sitting with support, loss of the tongue-thrust reflex, and clear interest in food. If your baby isn’t showing these yet, wait—follow their cues. See this AAP guidance.

    Why Iron-Fortified Cereal Matters

    Iron supports growth—especially brain development. After about 6 months, breast milk or formula alone may not meet iron needs, so iron-fortified cereal is a common first food. For background, see this infant nutrition overview (CDC).

    Baby

    Baby’s First Foods: Texture Progression

    Advance gradually as skills develop: smooth purées → thicker purées/soft mashes → soft, bite-size finger foods. This builds oral-motor skills and supports safe chewing.

    Baby’s First Foods by Age: 6–12 Months

    Age Suggested Foods Texture Target Meals/Day
    6–7 months Iron-fortified cereal; puréed fruits/veg (apple, pear, carrot, sweet potato); puréed meats Smooth & thin 1–2
    7–8 months Avocado, oatmeal, mashed banana/peas; lentils; shredded chicken Thicker purée / soft mash 2–3
    8–9 months Soft lumps; full-fat yogurt; egg yolk; soft-cooked veg (carrot, zucchini) Soft mash with small lumps 3 + snacks
    10–12 months Finger foods: diced soft fruit, soft pasta, small pieces of soft chicken or beef; cheese Small bite-size pieces 3 + snacks

    Foods to Avoid (Salt, Sugar, Honey)

    • Salt: Immature kidneys—keep foods unsalted; avoid salty processed foods.
    • Sugar: Skip added sugars/sweet snacks to prevent preference for overly sweet flavors.
    • Honey: No honey before 12 months due to infant botulism risk.

    Practical Tips

    • Introduce one new food at a time; wait 3–5 days to watch for reactions.
    • Start small and follow your baby’s pace—no pressure to finish.
    • Use a high chair; keep posture upright and mealtimes calm.
    Baby

    Sample Meal Ideas

    • Breakfast: Oatmeal + mashed banana
    • Lunch: Puréed carrot + sweet potato
    • Snack: Soft avocado chunks or small pieces of cooked egg
    • Dinner: Mashed peas + lentils
    Milk feeds: Continue breast milk or formula as the main drink and offer it after or between solids. Rough guide—6–7 months: on-demand ~5–6 feeds/day (formula ≈ 24–32 oz / 700–950 ml); 8–9 months: 4–6 feeds/day (≈ 20–28 oz / 600–830 ml); 10–12 months: 3–4 feeds/day (≈ 16–24 oz / 470–700 ml). Avoid cow’s milk as a drink before 12 months (small amounts of yogurt/cheese are fine). Small sips of water with meals are okay after 6 months.

    This baby’s first foods guide helps you begin with confidence and keep meals safe, simple, and nourishing.

    What to Remember

    • Increase texture and variety gradually.
    • Watch your baby’s cues; don’t rush.
    • Keep meals balanced; ask your pediatrician for personalized advice if needed.

    With patience and consistency, your baby will build healthy eating habits that last a lifetime.

  • How to Create a Newborn Sleep Schedule That Works

    Newborn baby sleeping peacefully in a cozy bassinet at night, part of a gentle newborn sleep schedule with warm soft lighting in a Scandinavian-style nursery

    Every baby is different, but following a gentle newborn sleep schedule can make life easier for both you and your little one.

    Why a Gentle Newborn Sleep Schedule Matters

    Newborns typically sleep 14–17 hours a day in short 2–4 hour stretches. It’s too early for strict timing, but simple patterns help your baby feel secure and make your days more predictable. For safety basics, see the American Academy of Pediatrics.

    Step-by-Step Guide to a Gentle Newborn Sleep Schedule

    Step 1

    Understand Your Baby’s Sleep Cues

    Look for early signs like rubbing eyes, turning head away, zoning out, or mild fussiness. Putting baby down at the first signs of tiredness helps prevent overtiredness.

    Most newborns can only stay happily awake for 45–60 minutes in the first weeks.
    Step 2

    Set a Flexible Wake–Feed–Play–Sleep Flow

    This separates feeding from falling asleep and encourages better naps. Aim for a full feed, a few minutes of gentle play, then down for a nap before overtiredness hits—this rhythm supports your gentle newborn sleep schedule.

    Step 3

    Create a Calm Sleep Environment

    • Keep the room dim at night and brighter during the day.
    • Use white noise to mimic the womb and reduce sudden wake-ups.
    • Keep the room comfortably cool — about 68–72°F (20–22°C), and adjust based on how warm your baby’s neck/back feels.
    Open curtains for daytime naps so your baby still knows it’s daytime.
    Step 4

    Introduce a Simple Bedtime Routine

    Short and soothing works best: warm bath → feed → swaddle → soft lullaby → into the crib drowsy but awake. Keep the same order each night as part of your gentle newborn sleep schedule.

    Smiling new mother gently rocking her swaddled newborn during the day, creating a soothing baby bedtime routine as part of a gentle newborn sleep schedule

    Step 5

    Practice Safe Sleep

    Always place baby on the back, on a firm mattress, with no loose bedding, pillows, or toys. For details, see Mayo Clinic and the AAP safe sleep guidance above.

    Sample Gentle Newborn Sleep Schedule

    This sample gentle newborn sleep schedule is flexible—adjust to your baby’s needs and natural rhythm.

    TimeActivity
    7:00 AMWake & full feed
    7:45–8:00 AMNap (1–2 hours)
    10:00 AMFeed & short play
    10:45 AMNap
    …repeat during the day…Follow cues and 45–60 min wake windows early on
    8:00 PMBedtime routine (bath → feed → swaddle → crib)
    9:00 PM–overnightNight sleep with feeds every 2–4 hours

    Common Newborn Sleep Challenges (and How to Handle Them)

    Challenge

    Day–Night Confusion

    Keep daytime bright and interactive; keep nighttime calm, dark, and quiet with minimal eye contact during feeds.

    Challenge

    Frequent Night Waking

    • Normal for newborns—focus on low-stimulation feeds at night.
    • Ensure full feeds during the day to reduce “snacking.”
    Challenge

    Short Naps

    • Adjust wake windows (often 45–60 minutes in early weeks).
    • Use white noise and a darker room for naps.
    Challenge

    Only Sleeps on You

    Start with contact naps, then gradually transfer to the crib once baby is deep asleep; shorten holding time over a few days.

    Fix

    Quick Wins You Can Try Tonight

    • Dim lights 30–45 minutes before bedtime; keep noise low.
    • Use a consistent lullaby and swaddle as sleep cues.
    • Log sleep for 3–5 days to spot your baby’s natural rhythm and refine your gentle newborn sleep schedule.
    For realistic timelines and what “normal” looks like, the NHS baby sleep guidance is a helpful reference.

    When to Adjust the Schedule

    As your baby grows, wake windows lengthen and night stretches improve. Your gentle newborn sleep schedule will gradually evolve into a more predictable routine around 3–4 months.

    Helpful Next Reads

  • Newborn Must-Haves You’ll Actually Use

    Newborn Must-Haves You’ll Actually Use

    This practical newborn must-haves checklist keeps your prep simple, organized, and stress-free—so you buy only what you’ll actually use.

    Newborn must-haves neatly arranged in a wicker basket on a white bed.

    1) Why Keeping It Minimal Matters

    Babies grow fast and needs change within weeks. Keeping your newborn must-haves to the essentials reduces clutter, saves budget for quality items, and keeps your space calm and functional.

    2) Must-Have Newborn Essentials

    Feeding: Newborn Must-Haves You’ll Use Every Day

    Bottles & Nipples
    Even if breastfeeding, bottles help with pumped milk or shared feedings.
    Tip: Start with 4–6 oz bottles for newborns.

    Burp Cloths
    Protects your clothes from spit-up. Tip: Keep several around the house.

    Bottle Brush & Sterilizer
    Proper cleaning prevents bacteria build-up.

    Small baby bottles and burp cloths on a bright kitchen counter.

    💡 Tip: Planning ahead for postpartum recovery is just as important as preparing for your newborn. Check out our Complete Guide to Postpartum Recovery Essentials for must-have items every new mom needs.

    Sleep Essentials for Newborns

    Bassinet or Crib
    A safe, dedicated sleep space. Most families keep the crib or bassinet in the parents’ room for the first 3–6 months.

    Firm Mattress & Fitted Sheets
    A firm mattress and snug sheet keep baby safe.

    Swaddle Blankets or Sleep Sacks
    Helps baby feel secure without loose blankets.

    Baby Monitor
    Lets you hear/see baby instantly if in a different room.

    Newborn must-haves sleep setup: white crib with fitted sheet, swaddle, and a baby monitor.

    Diapering Newborn Must-Haves

    Newborn Diapers
    Absorbent and gentle. Don’t overstock newborn size.

    Wipes
    Fragrance-free reduces irritation.

    Diaper Cream
    Prevents/soothes rash.

    Changing Pad
    Portable and easy to clean.

    Diapering essentials in a small caddy with wipes and cream.

    Clothing Essentials

    Onesies — Easy and comfy for daily wear.

    Footed Sleepers — Keeps baby warm without blankets.

    Mittens & Hats — Prevent scratches and add warmth.

    Bathing & Grooming Essentials

    Baby Bathtub — Safe and supportive.

    Gentle Baby Wash — Mild and tear-free.

    Soft Towels & Washcloths — Gentle on skin.

    Nail Clippers or Emery Board — Trim nails while baby sleeps.

    Travel Essentials

    Infant Car Seat
    A must-have from day one for hospital discharge and any car ride. Choose a model that meets current safety standards.

    Baby Carrier / Wrap
    Helps keep baby close and your hands free. You can buy it later if you prefer, but it’s very useful for outings and soothing.

    3) Nice-to-Have Items

    • White Noise Machine
    • Pacifiers
    • Waterproof Mattress Protector
    • Diaper Caddy
    • Nursing Pillow
    • Changing Table

    4) What You Can Skip

    • Wipe Warmer
    • Shoes for Newborns
    • Too Many Fancy Outfits

    5) Tips for Setting Up Your Newborn Station

    Keep essentials within arm’s reach, use bins to categorize, and prep a small diaper kit for each floor.

    6) Final Thoughts

    By sticking to these newborn must-haves, you’ll keep life simple and focus on bonding with your baby.

    Newborn must-haves checklist graphic summarizing feeding, sleep, diapering, clothing, and bathing essentials.

    📌 For more baby product inspiration and practical tips, visit my Pinterest boards.

  • Complete Guide to Postpartum Recovery Essentials

    Postpartum Recovery Kit – Must-Have Essentials

    A must-have postpartum recovery kit can make your healing journey smoother and more comfortable.

    Why Postpartum Preparation Matters

    A well-prepared postpartum recovery kit can make a world of difference in your comfort and confidence after giving birth. According to the Mayo Clinic’s postpartum care guide, recovery needs vary widely, so having essentials on hand can help you manage discomfort and focus on bonding with your baby during those precious early weeks.

    Benefits of a Well-Stocked Postpartum Kit

    • Comfort — Reduces pain and discomfort during recovery.
    • Convenience — Keeps everything you need within arm’s reach.
    • Confidence — Helps you feel more prepared and in control.

    Postpartum Essentials Overview

    Postpartum recovery kit in a brown bag on a bed, including peri bottle, maternity pads, nursing bra, nipple cream, cotton pads, and disposable nursing pads.

    Must-Have Postpartum Recovery Items

    These items are considered essential by most new moms:

    Peri Bottle

    Helps gently rinse after using the bathroom, keeping the perineal area clean and reducing discomfort.

    Use warm water for extra comfort.

    Witch Hazel Pads

    Soothes swelling, itching, and irritation — especially after vaginal delivery.

    Chill in the fridge for an extra cooling effect.

    Adult Postpartum Diapers / Heavy Pads

    Absorbs heavy postpartum bleeding and prevents leaks.

    More convenient than pads and underwear during the first few days.

    Nursing Bra

    Provides gentle support while making breastfeeding easier.

    Choose soft, stretchy materials for comfort, especially at night.

    Nipple Cream

    Prevents and soothes cracked or sore nipples.

    Apply after each feeding to keep skin moisturized.

    Disposable Nursing Pads

    Prevents milk leaks and protects clothing.

    Change pads regularly to avoid irritation.

    Comfort Items Worth Considering

    These aren’t essential for every mom, but they can make recovery more comfortable:

    • Maternity Bed Pads — Protect bedding from leaks.
    • Postpartum Belly Wrap — Gentle abdominal support, especially for C-section recovery.
    • Disposable Underwear — Hygienic and easy to change during heavy bleeding or night feedings.
    • Sitz Bath — Relieves soreness and promotes healing.
    • Perineal Ice Packs — Instant cooling relief.
    • Nursing Pillow — Helps position baby for breastfeeding.

    Hospital Supplies vs. At-Home Needs

    Item Provided by Hospital? Should You Prepare?
    Peri BottleYesOptional — upgraded versions are more comfortable
    Heavy PadsYesYes — for after discharge
    Mesh UnderwearYesOptional — softer alternatives can feel better
    Witch Hazel PadsNoYes
    Nipple CreamNoYes
    Nursing PadsNoYes

    Postpartum Recovery Tips

    1. Accept Help from Others — Allow friends or family to assist with meals, errands, or caring for the baby.
    2. Eat Nutrient-Dense Foods — Include high-protein and iron-rich meals to support healing.
    3. Stay Hydrated — Keep water nearby during breastfeeding sessions.
    4. Move Gently — Short walks can help circulation and mood.
    5. Care for Your Mental Health — Monitor your emotions and seek support if needed; see the NHS postnatal care advice for additional guidance.

    For more medical background on typical recovery, the Cleveland Clinic postpartum care overview is also helpful.

    Postpartum Essentials Visual Guide

    Here’s a quick visual summary of the essentials discussed above. Save this image for quick reference while preparing your recovery kit.

    Postpartum recovery kit checklist with illustrations of peri bottle, witch hazel pads, adult postpartum diapers, maternity bed pad, nursing bra, nipple cream, disposable nursing pads, postpartum belly wrap, and disposable underwear.

    Final Thoughts

    Preparing your postpartum recovery kit ensures a more comfortable and confident recovery.

    💡 For more postpartum ideas, visit my Pinterest Boards
  • Postpartum Essentials Checklist Every New Mom Needs

    Getting Ready for Postpartum Recovery

    Bringing home your new baby is an unforgettable moment — but postpartum recovery can be both physically challenging and emotionally overwhelming.

    While hospitals or birth centers may provide some basic recovery items, you’ll still need to prepare a few essentials for the weeks after birth.

    This guide covers must-have postpartum essentials most new moms rely on, plus some optional comfort items you might consider.

    Postpartum recovery kit in a brown bag on a bed, including peri bottle, maternity pads, nursing bra, nipple cream, cotton pads, and disposable nursing pads.

    Must-Have Postpartum Essentials

    These are the items most moms agree they couldn’t live without:

    Peri Bottle
    Helps you gently rinse after using the bathroom, keeping the perineal area clean and reducing discomfort.

    Witch Hazel Pads
    Soothes swelling, itching, and irritation — especially common after vaginal birth.

    Adult Postpartum Diapers / Heavy Pads
    Absorbs heavy postpartum bleeding without leaks.

    Nursing Bra
    Makes breastfeeding easier while providing gentle support.

    Nipple Cream
    Prevents and soothes cracked or sore nipples during breastfeeding.

    Disposable Nursing Pads
    Prevents milk leaks and protects clothing.

    Nice-to-Have Comfort Items for Postpartum Recovery

    These aren’t essential for every mom, but they can make recovery easier:

    • Maternity Bed Pads — Protect bedding from leaks.
    • Postpartum Belly Wrap — Gentle abdominal support, especially for C-section recovery.
    • Disposable Underwear — Extra convenience beyond what’s provided at the hospital.
    • Sitz Bath — Relieves soreness and promotes healing.
    • Perineal Ice Packs — Instant cooling relief.
    • Nursing Pillow — Helps position baby for breastfeeding.
    • Large Insulated Water Bottle — Stay hydrated during breastfeeding.

    Postpartum Essentials at a Glance

    Here’s a quick visual reference of the postpartum essentials we’ve covered above. You can save this image for easy access and refer back to it while preparing your recovery kit.

    Postpartum essentials checklist with images of peri bottle, witch hazel pads, adult postpartum diapers, maternity bed pad, nursing bra, nipple cream, disposable nursing pads, postpartum belly wrap, and disposable underwear for recovery after childbirth.
  • Hospital Bag Checklist: What to Pack for Mom, Baby & Partner

    Packing your hospital bag is an essential step in preparing for your baby’s arrival. To help you avoid stress, here’s a comprehensive hospital bag checklist for mom, baby, and your partner. This guide also includes bonus tips,  and answers to frequently asked questions.

    When Should You Pack Your Hospital Bag?

    Aim to have your hospital bag ready around 36-37 weeks. Babies can arrive earlier than expected, so having everything ready helps reduce anxiety and last-minute stress.

    Hospital bag checklist for mom, baby & partner - items to pack for a comfortable stay.

    Why It’s Important to Pack Thoughtfully

    Having your own items ensures comfort, hygiene, and a sense of control in an unfamiliar hospital setting. Hospitals provide basics, but they may not be the most comfortable or suited to your preferences. Thoughtful packing supports a smoother postpartum experience for you and your partner.

    Hospital bag checklist essentials for mom – nursing bras, comfortable underwear, and travel-size toiletries

    Hospital Bag Checklist for Mom

    • ID & Insurance Card – Required for hospital check-in.

    • Birth Plan – Outline your labor preferences.

    • Nursing Nightgown & Bras – Soft and easy-access for breastfeeding.

    • Nursing Pads & Maternity Pads – For postpartum care and leakage.

    • Comfy Underwear & Loose Clothing – Prioritize breathable materials.

    • Slippers & Socks – Easy for walking around the hospital.

    • Lip Balm & Toiletries – Hospital air is often dry.

    • Snacks & Reusable Water Bottle – Stay energized and hydrated.

    • Phone Charger (extra-long cord) – Outlets may be far from the bed.

    • Essential Oils or Relaxation Tools – Optional, for a soothing environment.

    chatgpt image 2025年8月6日 16 56 17

    Hospital Bag Checklist for Baby

    • Newborn Onesies & Sleepers – Bring at least 2-3.

    • Receiving Blanket & Swaddles – Comfort and warmth.

    • Diapers & Wipes – Most hospitals provide these, but extras help.

    • Baby Hat & Mittens – Newborns lose heat quickly.

    • Going-Home Outfit – Choose something weather-appropriate and adorable.

    • Infant Car Seat – Required to leave the hospital.

    • Burp Cloths & Pacifiers – For feeding support and soothing.

    • Baby Lotion or Diaper Cream – Gentle on sensitive skin.

    Hospital bag checklist for partner – grey t-shirt, shorts, socks, water bottle, camera, and earphones

    Hospital Bag Checklist for Partner

    • Change of Clothes & Hoodie – Hospitals can be chilly.

    • Toiletries – Toothbrush, deodorant, etc.

    • Snacks & Refillable Bottle – Stay alert during long labor.

    • Phone/Camera & Charger – For documenting milestones.

    • Books/Tablet/Earbuds – Stay entertained during downtime.

    • Cash for Vending Machines or Parking

    What the Hospital Usually Provides

    Most hospitals offer:

    • Maternity pads

    • Mesh underwear

    • Diapers and wipes

    • Basic baby hat and blanket

    However, comfort and quality may vary, so bring your preferred brands for a smoother experience.

    Packing Tips & Common Mistakes

    • Label bags by person: Mom, Baby, Partner
      → This helps everyone quickly find what they need during a hectic time.

    • Don’t overpack clothes – the hospital stay is short
      → You’ll likely wear the same comfy clothes most of the time.

    • Bring your own pillow with a colored case
      → Hospital pillows can be flat and uncomfortable. A colored case keeps it from getting mixed up with hospital linens.

    • Pack like a weekend trip – comfort over style
      → Prioritize things that make you feel cozy and clean rather than fashionable.

    • Keep a small bag in the car in case of emergency
      → In case you go into labor away from home or forget something, a backup bag can be a lifesaver.

    FAQs

    Q: Should I pack for a C-section even if I plan to deliver vaginally?
    Yes. Things may change quickly—it’s best to prepare for both.

    Q: How many outfits does my baby need?
    Pack at least 2-3, in case of messes.

    Q: Should I bring diapers?
    Hospitals usually provide newborn diapers, but it’s good to have extras.

    Free Printable Hospital Bag Checklist

    Hospital bag checklist infographic for mom, baby, and partner – essential items to pack for delivery

     Download your free printable Hospital Bag Checklist PDF here. Use it as you shop and pack to stay organized!