Milestone Photos at Home: Cheap Gear That Looks Pro
I have a folder on my phone called “month 1” through “month 12,” and I will be honest with you: about half of those early shots were blurry, yellow-tinted, and taken on a rumpled bed while I quietly panicked that my daughter was about to roll off it. The monthly photo is one of those lovely traditions nobody warns you is weirdly hard to actually pull off with a wiggly baby and a phone.
Here’s the thing I wish someone had told me sooner, before I started eyeing pricey newborn sessions: the difference between a snapshot and a “did you hire someone?” photo is almost never the camera. Your phone is plenty. What separates the two is light, a clean background, and the baby actually being still and in focus. Once I understood that, a handful of cheap tools did more for my photos than any expensive gadget could have.
So this is the gear I’d point a friend to: the inexpensive stuff that quietly does the “pro” heavy lifting, plus the free techniques that matter just as much.
The “looks pro” formula (it’s simpler than it sounds)
Almost every milestone photo that makes you go oof, that’s gorgeous is doing four quiet things: soft directional light, a clean and consistent background, the phone held perfectly still, and one clear focal point (your baby’s face). That’s it. The gear below just nudges each of those levers without nudging your bank account.
I’ve split it into two layers. First, the three things that genuinely make a photo look professional. Then the cute keepsake layer: the blankets and markers that make it a milestone photo and not just a nice picture.
Layer one: the three things that actually look pro
1. Soft, directional light (start free, then add a little)
Window light is the secret the pros lean on, and it costs nothing. Lay your baby down with the top of their head pointed toward the window, not their feet — that way the light washes gently down the face instead of up the nose. A few feet back from a big, bright window with the harsh midday sun not streaming directly in is genuinely all you need on a good day.
But babies don’t schedule their cutest months for sunny weeks, and if you’re shooting at 4 p.m. in November, window light alone gets thin and gray. That’s where a small, daylight-balanced LED panel earns its keep. Something like the ULANZI VL49 is a pocket-sized, rechargeable panel with a high color-accuracy rating, so the light it throws actually looks like clean daylight rather than that sickly phone-flash green. It charges over USB-C and you can use it while it charges.
One honest caveat, because I’d rather you not be disappointed: a little panel like this is a fill light, not a sun replacement. In a pitch-dark room it won’t magically light the whole scene. Use it the way I do — window light as your main source, the panel set low to lift the shadow side of your baby’s face. That combo is what reads as “professional.”
2. A way to hold the phone still and shoot hands-free
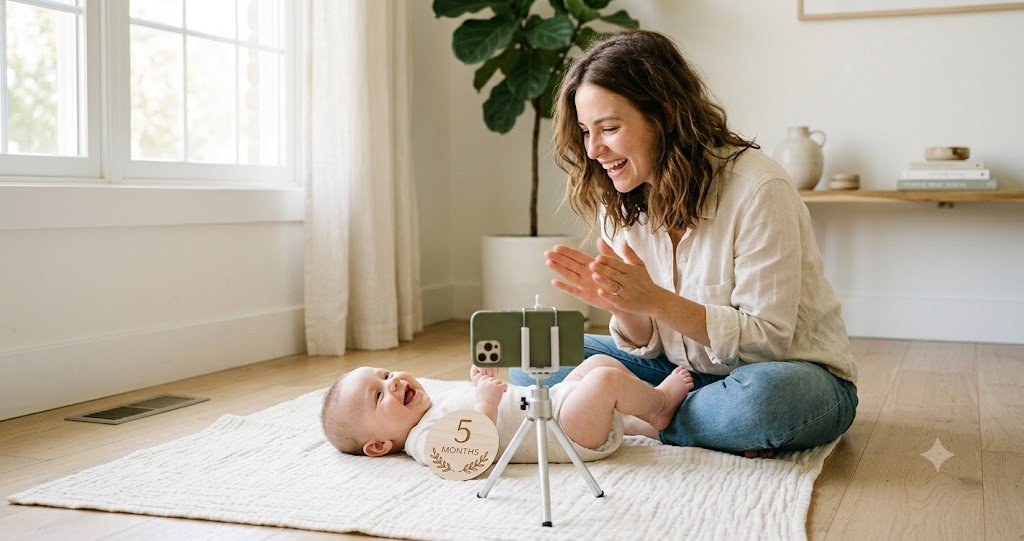
So much milestone-photo blur comes from one hand holding a phone while the other tries to keep a sock on a baby. A cheap phone tripod fixes this and changes the whole experience. I’d look at something like the SENSYNE 62″ phone tripod, which extends tall, has a 360° head so you can shoot horizontal or vertical, and (the part that matters most) comes with a little Bluetooth remote shutter.
That remote is the unsung hero. Frame your shot, step back, get your baby to look up, and click. No leaning over the lens, no shadow falling across the scene, and if you want to be in the photo holding your little one, you finally can. It folds down into a selfie stick too, which is handy for the inevitable “all of us, quick, before someone cries” shot.
A couple of real-world notes from how these tripods actually behave: it’s a lightweight phone tripod, so keep it at a moderate height for the steadiest results (fully extended it can wobble a touch), and it’s built for phones and small cameras, not a heavy DSLR. The remote also runs on a little coin battery rather than recharging, so it’s worth tucking a spare in the drawer.
3. A reflector: the cheapest trick that looks the most expensive
If I could only add one “real photographer” tool to a phone setup, it’d be a collapsible reflector, and almost nobody mentions them. A 5-in-1 like the Etekcity 24″ reflector is small, folds flat, and does two genuinely transformative things. The translucent center, held between a harsh window and your baby, softens hard light into that dreamy, even glow. The white or silver side, propped on the shadow side of your baby’s face, bounces light back and erases that half-dark, uneven look that screams “phone snapshot.”
The 24″ size is just right for a baby — big enough to matter, small enough to manage one-handed (or propped against the couch). Two honest notes: it’s sized for little ones and headshots, not big group scenes, and folding it back down takes a few tries before the wrist-flick clicks. Worth it.
Layer two: the keepsake gear that makes it a “milestone”
4. A milestone blanket for a consistent background
The reason those month-by-month grids look so satisfying is consistency: same blanket, same spot, every month, so you can actually see your baby filling more of the frame as the year goes on. A dedicated milestone blanket does that job and looks intentional doing it.
I’d steer toward an organic-cotton one like the Pondering Pine organic milestone blanket (it’s a small US brand, and it’s GOTS-certified organic, which matters when it’s pressed against newborn skin all year). It’s generously sized at 47″ square, comes with a little month-marker frame, and the higher-contrast designs are actually good for catching a young baby’s eye. Bonus: once the photo year is over it keeps living as a swaddle or play mat, so it’s not a single-use purchase.
Just know it’s a soft keepsake blanket, not a seamless studio backdrop — if you want a perfectly blank, wrinkle-free background, that’s a separate piece of fabric. For most of us at home, the blanket is exactly the right amount of “nice.”
5. Month markers that read in the photo
You need some way to say which month it is, and the photogenic option is a set of wooden discs. A double-sided set like these Giftacity wooden milestone discs (the well-known Pearhead brand makes a near-identical set if you’d rather grab a name you recognize) tucks neatly beside your baby, looks more grown-up than peel-and-stick belly stickers, and is reusable month after month. The neutral wood tone works for any nursery palette.
One thing to check before you buy anything in this category: get discs around 4 inches across. The most common gripe with the tiny ones is that they’re too small to actually read once the photo is taken, and a marker you can’t read kind of defeats the purpose.
The free stuff that matters just as much
Gear is only half of it. These cost nothing and made the biggest difference for me:
- Shoot at the same time of day, every month. Pick when your window light is soft and your baby is usually content (mine was a mid-morning baby). Consistent light makes the whole series look like a set.
- Lay babies down for the first year. A flat, straight-down or slightly-above shot of a baby on the blanket is easier, safer, and far more flattering than trying to prop a floppy newborn into a “pose.”
- Fill the frame. Get closer than feels natural. A baby swimming in empty blanket reads as amateur; a baby filling the frame reads as a portrait.
- Use one editing preset all year. A free app like Lightroom mobile or A Color Story, with the same filter applied to all twelve photos, quietly ties the whole series together and evens out summer-vs-winter light. This is genuinely the closest thing to a magic “make it pro” button.
And honestly — have your partner or whoever’s around stand right behind you making absurd noises. Half my best frames happened because my husband was quacking like a duck just over the phone. The gear gets the focus and the light right; the people you love get the smile.
Putting it all together: a five-minute home setup
Here’s the routine I landed on by about month four, which is roughly when I stopped dreading these. Find the floor space by your biggest window. Lay the milestone blanket down with your baby’s head toward the light. Set the phone on the tripod, angled down from above for a flat-lay or pulled back for a wider shot, and prop the reflector’s white side on the shadow side of the face. Set the month disc beside them. Remote in your hand, someone silly behind you. Take way more frames than you think you need, because you only need one. Apply your one preset that night. Done.
None of this is expensive, and none of it is complicated once you’ve done it twice. The whole kit costs less than a single professional session, and you get to keep capturing those everyday faces — the milk-drunk grin, the brand-new bottom teeth — for the whole fleeting year. If you’re still deep in the newborn fog, our newborn witching-hour survival guide and a realistic newborn essentials checklist are good companions to this one. And if you want to know what those photos are actually documenting, the CDC’s developmental milestone guide is a lovely thing to glance at alongside your monthly pics.