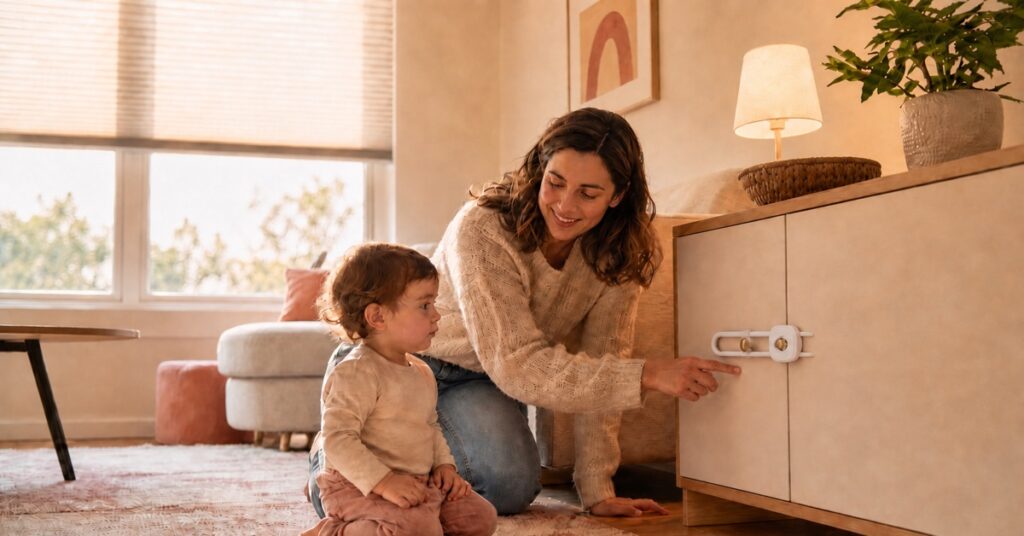
The first question most renters ask is, “How do I babyproof without losing my deposit?” I understand the instinct. But the more useful question is: Which hazards can be handled with removable changes—and which ones still need secure hardware?
A good rental-friendly setup is not a shopping cart full of stick-on gadgets. It is a room-by-room system: move hazards out of reach, block access, lock what remains, and anchor the things that could seriously hurt a child if they tipped or failed.
You can do a large part of apartment babyproofing without permanent changes by rearranging furniture, moving dangerous items, using properly fitted locks and barriers, managing cords, and creating a safe play zone. But furniture and TV restraints, a gate at the top of stairs, some window protections, and a freestanding range’s anti-tip bracket may require hardware. In those cases, ask for written permission or an owner-installed solution—do not swap in a weaker adhesive fix just to avoid a small hole.
My renter rule: protect the child first, then protect the deposit. A neat patch at move-out is a manageable problem. A safety device that cannot hold when it matters is not.
Start with a floor-level apartment audit
Babyproofing makes much more sense from the height of a crawling baby or curious toddler. Get down on the floor and move through the home slowly. Look for what can be pulled, climbed, opened, swallowed, wrapped around a neck, or used to reach something higher.
Do this again when your child starts a new skill. Rolling, crawling, pulling to stand, climbing, and turning handles all change the map of your home.
- Pull: lamp cords, tablecloths, charging cables, blind cords, monitor cords, and anything dangling from a counter.
- Climb: low shelves, drawers that form “steps,” chairs near windows, and furniture beside railings.
- Open: cabinets, drawers, doors, toilets, appliances, and battery compartments.
- Swallow: coins, magnets, button batteries, medicine, detergent pods, pet food, and small pieces under furniture.
- Tip: dressers, bookcases, televisions, floor lamps, and freestanding ranges.
If you want a broader pass through the entire home, use our complete room-by-room babyproofing checklist alongside this renter-specific guide.
The green, yellow, and red guide to no-drill babyproofing
“No-drill” is a useful installation preference, not a safety standard. This matrix helps you decide where removable methods make sense and where you should pause and coordinate with your landlord or property manager.
| Zone | What it means | Good examples | Important limit |
|---|---|---|---|
| Green: removable | Start here. These changes usually do not alter the property. | Move medicine and chemicals; relocate breakables; contain cords; remove climbable furniture; use a closed play yard as directed; choose properly fitted cabinet locks. | “Removable” does not mean maintenance-free. Test locks and barriers, and keep high-risk items locked and out of reach. |
| Yellow: verify first | Fit, surface, lease terms, or emergency access matters. | Pressure-mounted gates in eligible non-stair openings; adhesive latches; door locks; window-opening controls; appliance locks. | Follow the specific instructions. Adhesive can damage finishes, and an installation may be unsuitable for that location even if it “sticks.” |
| Red: hardware likely | The consequence of failure is too high for an improvised removable substitute. | Furniture and TV restraints; top-of-stairs gates; certain window guards; a freestanding range anti-tip bracket. | Request written approval or owner installation. If the building may contain lead paint, ask about lead-safe work before disturbing painted surfaces. |
Always follow the instructions for the exact safety device and surface. A product that works in one doorway, cabinet, or window may not be suitable for another.
A room-by-room renter-friendly setup
Use the same four verbs in every room: Move → Block → Lock → Anchor. Moving a hazard is often the simplest and most reliable rental-friendly fix. Locks and barriers come next. Anchoring is for the hazards that can tip, fall, or fail with serious consequences.
Living room: remove the climb before adding gadgets
- Move: Put remotes, loose batteries, small décor, candles, and breakables out of reach. Secure the battery compartments on devices that stay in the room.
- Block: Cover or reroute cords so they cannot be pulled. Create a clear play area away from fireplaces, heaters, floor lamps, and media equipment.
- Lock: Use child-resistant storage for items that cannot be relocated, and check it regularly.
- Anchor: Secure televisions and furniture that could tip. Do not treat an adhesive strip as a substitute for a restraint installed according to the furniture and restraint instructions.
A clever layout can reduce temptation: remove baskets and ottomans that form steps to a console, and avoid placing toys on shelves you do not want climbed. For the high-consequence part, see our furniture and TV anchoring guide.
Kitchen and dining area: move the dangerous items before locking the cabinet
- Move: Store medicine, cleaners, detergent pods, alcohol, knives, matches, and button batteries high, locked, and in their original containers.
- Block: Keep chairs and step stools away from counters, the stove, windows, and balcony doors. Turn pot handles inward and keep hot food and cords back from the counter edge.
- Lock: Add appropriate latches to accessible cabinets and drawers, but remember that a latch is only one layer.
- Anchor: Confirm that a freestanding range has its anti-tip bracket installed. If you cannot verify it, ask the property manager to inspect or correct it.
One low cabinet can hold safe items such as dish towels or plastic containers. Giving a toddler one acceptable place to explore is often easier than making every door a battle.
Bedroom or nursery: protect the sleep zone, cords, and furniture
- Move: Keep pillows, loose blankets, bumpers, and added positioning products out of an infant’s sleep space. Move medicine, creams, and small objects away from the changing area.
- Block: Keep baby-monitor cords and parts at least three feet from the crib or other sleep space. Keep the crib away from windows and window-covering cords.
- Lock: Secure accessible closet or drawer contents that pose a hazard, and install door hardware only if adults can still open the door quickly.
- Anchor: Anchor dressers, bookcases, and televisions. Closing a drawer or moving the dresser does not remove the tip-over risk.
As your child grows, recheck the whole room from the top rail of the crib and from standing height. What was unreachable last month may now be a handhold.
Bathroom and laundry: water safety is hands-on
- Move: Put medicine, razors, cosmetics, cleaning products, and laundry products high, locked, and out of sight. Keep them in original containers.
- Block: Keep the bathroom and laundry area inaccessible when you are not using them if your layout allows. Empty tubs, buckets, and other water containers immediately after use.
- Lock: Lock accessible storage that contains hazardous items. Check that each latch still holds after repeated use.
- Anchor: This room usually needs fewer wall anchors, but a tall freestanding storage unit still needs the same tip-over evaluation as furniture elsewhere.
No bath gadget replaces an adult within arm’s reach. Set out the towel, clean clothes, and toiletries before the water goes on so you do not have to step away.
Stairs and hallways: location decides the gate
- Move: Clear shoes, bags, toys, and cords from the path. Keep climbable objects away from railings.
- Block: Use a child safety gate that fits the opening and location. At the top of stairs, the U.S. Consumer Product Safety Commission says to use a gate that screws to the wall—not a pressure-mounted gate.
- Lock: If an exterior or utility door needs an added lock, make sure an adult can still open it quickly in an emergency.
- Anchor: Treat the top-of-stairs gate as a hardware-required safety installation. Ask for permission rather than substituting a pressure gate or pet gate.
Gate labels and marketing names are not enough; the installation location, opening width, mounting surface, and instructions all matter. Our baby gate guide explains the major gate types and fit questions.
Windows, blinds, and balconies: never rely on the screen
- Move: Pull beds, sofas, toy boxes, chairs, and low tables away from windows and balcony railings.
- Block: A window screen is not fall protection. Use an appropriate window guard or opening-control solution while preserving required emergency escape. The CPSC advises limiting accessible window openings to four inches or less.
- Lock: Choose cordless window coverings when possible. Keep every cord and continuous loop inaccessible, and use the required tension device or anchor.
- Anchor: Some window guards and cord-tension devices require secure mounting. This is another place to involve the landlord instead of improvising.
Balcony safety is specific to the building, railing, door, and local requirements. If there is a climbable rail, a large gap, or an unsafe door, report it and request a building-approved correction.
Entry, patio, and pet zones: control the transition points
- Move: Store coins, keys with button batteries, bags, tools, and pet medicine out of reach as soon as you come home.
- Block: Create separation from litter boxes, pet food, grills, heaters, and utility closets. Use a child gate for a child—not a pet gate as a substitute.
- Lock: Make exterior doors harder for a toddler to operate while keeping adult emergency exit simple.
- Anchor: Secure tall shoe cabinets, coat storage, or shelving that could tip when climbed.
What to ask your landlord to install or approve
Do not send a vague message asking whether you can “babyproof.” Name the hazard, the exact location, and the type of installation. Ask for a written response, and offer a simple restoration plan if appropriate.
Subject: Safety installation request for [room/location]
Hello [name],
I am writing to request written approval for a child-safety installation at [exact location]. The hazard is [for example: a tip-prone dresser / the top of the stairs / an accessible window / a freestanding range without a verified anti-tip bracket].
The proposed solution is [device or installation type], installed according to the manufacturer’s instructions into [surface, if known]. Please let me know whether you prefer to have building maintenance complete the work or approve a qualified installer.
If the building was constructed before 1978 or its age is uncertain, please also share any relevant lead-paint information and the required lead-safe procedure before painted surfaces are disturbed.
I am happy to document the installation and discuss appropriate patching or restoration at move-out. Thank you for helping us address this safety concern.
Best,
[your name and unit]
Lease terms, accessibility rules, building codes, and tenant protections vary. This template is practical communication guidance, not legal advice.
A note about drilling in older rentals
Homes built before 1978 are more likely to contain lead-based paint. The concern is not simply “an old wall”; it is deteriorating paint and dust created when a painted surface is drilled, scraped, sanded, cut, or repaired.
If your building predates 1978—or you do not know its age—pause before disturbing painted surfaces. Ask for the lead disclosure or available records and for the owner’s lead-safe installation process. Do not dry-sand or casually drill first and investigate later. The EPA’s lead information for families and its lead-safe DIY guidance explain why renovation dust needs special care.
Your move-out restoration file
A few minutes of documentation now can prevent confusion later. Keep one folder with the lease, written approvals, device instructions, dated photos, invoices, and any maintenance messages.
- Photograph the surface before installation.
- Save the landlord’s written permission or work order.
- Keep the product name, instructions, hardware list, and installer details.
- Photograph the completed installation and record the date.
- Inspect safety devices regularly and after a move, impact, or visible loosening.
- Before move-out, ask whether the owner wants approved hardware left in place or removed.
- Use the agreed restoration method; do not disturb a potentially lead-painted surface without appropriate guidance.
- Take final dated photos after restoration.
Do not remove critical safety hardware early just to prepare for a move. Keep the protection in place while your child still has access to the hazard, then coordinate removal and restoration at the appropriate time.
Frequently asked questions
Can I babyproof an apartment without drilling?
You can make many meaningful changes without drilling: move hazards, manage cords, lock dangerous products high and out of sight, block eligible areas, and remove climbing routes. But some high-consequence hazards may still require hardware, including tip-prone furniture and TVs, a gate at the top of stairs, certain window protections, and a range anti-tip bracket.
Are adhesive furniture anchors safe?
Do not assume an adhesive strip is an adequate furniture restraint. Follow the furniture manufacturer’s and restraint manufacturer’s instructions, including the specified wall attachment and hardware. For a rental, request written approval for the correct installation.
Can I use a pressure-mounted gate at the top of stairs?
No. The CPSC says to use only gates that screw to the wall at the top of stairs. A pressure-mounted gate may be an option in some eligible non-stair openings when the product instructions, fit, and surfaces allow it.
Are window screens enough to keep a toddler from falling?
No. Window screens are designed for insects, not fall prevention. Use an appropriate window guard or opening-control solution, keep climbable furniture away, and preserve required emergency escape.
What if my landlord says no to every wall-mounted device?
Reply with the specific hazard, the product instructions or authoritative safety guidance, and options such as owner installation or an approved installer. Keep the exchange in writing. Because tenant protections and building requirements vary, seek qualified local housing or legal guidance if a necessary safety correction remains unresolved.
How often should I redo the babyproofing audit?
Recheck the home whenever your child gains a new skill, after rearranging furniture, after moving, and whenever a device looks loose or stops working as expected. Follow each manufacturer’s inspection and maintenance instructions.
The calmest way to begin
Start with one floor-level walk-through and a laundry basket. Move every medicine, battery, chemical, cord, and small object you can solve immediately. Then make a short list of the hazards that need a fitted lock, gate, guard, or anchor.
That list is your real babyproofing plan. Some fixes will take five minutes and leave no mark. Others deserve a careful email, the right hardware, and a small repair later. Rental-friendly babyproofing is not about pretending every risk has a peel-and-stick answer. It is about making the safest appropriate choice for each hazard—and documenting it well.
Safety sources
- U.S. Consumer Product Safety Commission: Childproofing Your Home
- U.S. Consumer Product Safety Commission: Anchor It!
- U.S. Consumer Product Safety Commission: Baby Monitor Cord Safety
- American Academy of Pediatrics: Poison Prevention
- American Academy of Pediatrics: A Parent’s Guide to Safe Sleep
- U.S. Environmental Protection Agency: Protect Your Family from Sources of Lead
This article provides general U.S.-oriented safety information. Your child, home, lease, products, and local requirements may differ. Follow current product instructions and consult the appropriate pediatric, housing, building-safety, or legal professional when needed. No safety device replaces attentive adult supervision.