I have done this three times now, and I will tell you the honest version: the first time, I bought a giant box of everything a baby store told me I needed, installed about a third of it, and discovered my daughter had found the one drawer I forgot. The second and third time around, with my two boys, I got faster, calmer, and a lot more selective about what actually earns a spot in the house.
So this isn’t a “buy 47 gadgets” list. It’s the room-by-room baby proofing checklist I’d hand a friend, with the specific category of product that solves each problem and the few I’d skip. The goal is a home your kid can explore without you hovering over every outlet.
One thing worth saying up front: the experts agree on the timing. Most babies start crawling somewhere around 6 to 10 months, and the advice from pediatricians is to have the basics in place before that happens, not after. Per the CDC, unintentional injury is a leading cause of death for children ages 1 to 4, and almost all of it is preventable with a quiet afternoon and a few well-chosen tools.
Building your baby gear list?
Grab the free Baby Gear & Registry Checklist — every item sorted by budget, what to skip, and what’s safe to buy used, plus the safety & recall checks I run before buying.
How to do this without buying out the baby aisle
You don’t need everything at once. Match the work to where your kid actually is:
- Pre-crawling (newborn–6 months): the slow lane. Anchor any top-heavy furniture and a TV, deal with blind cords, and put cleaning products and meds up high. That’s it.
- Crawling and pulling up (6–12 months): outlets, low cabinets, sharp corners, and a gate wherever there are stairs. When my youngest son started pulling up on the coffee table at around nine months, this is the week it all suddenly mattered.
- Walking and climbing (12 months+): door knobs, toilet, stove knobs, and re-checking your anchors, because now they climb. My older son treated the dresser drawers like a staircase. Ask me how I know.
If you’re still in the planning stage, our baby registry checklist covers what you actually need before any of this. Now, room by room.
Living Room & Whole-House Basics
This is where families spend the most time, so it’s where most of the bumps happen. Three things cover the majority of it.
Electrical outlets → outlet covers
Every reachable outlet needs covering. For the outlets you never use, simple plug-in caps do the job. The GE / Power Gear child-safety outlet covers are an inexpensive, UL-listed multipack and a long-running Amazon best seller.
One real caveat: those little caps are a small part that, once pried out, is itself a choking hazard, and for any outlet you actually use, a cap is a hassle. For in-use outlets, I’d spend a little more on a self-closing sliding outlet cover or a box-style cover. Cover the dead outlets with caps, the live ones with sliders.
Tip-overs → furniture & TV anchors
If you do one thing on this entire list, do this one. Dressers, bookcases, and TVs that aren’t strapped to the wall tip over onto kids more often than people realize. The CPSC’s Anchor It! data shows tip-overs are overwhelmingly a hazard for children five and under. The Booda Brand metal furniture anchors are a sturdy, all-metal strap kit, a top seller with everything you need in the box.
How I use them: two straps per piece, fixed into a wall stud, not just drywall. Anchor anything a toddler could climb. The dresser is the classic offender, because the open drawers look exactly like stairs to a determined one-year-old.
Sharp corners → corner & edge guards
Coffee tables, hearths, low windowsills: all roughly head-height for a new walker. The Wappa Baby corner protectors use a clear ball-and-L shape that, sensibly, is harder for a baby to pry off and swallow than the flat foam kind. For long table edges, pair them with an adhesive edge-bumper strip.
Living room checklist
- Cover every reachable outlet (caps for unused, sliders for in-use)
- Anchor every dresser, bookshelf, and the TV to a wall stud
- Pad sharp corners and hard edges at toddler height
- Wind up or tuck away lamp and electronics cords
- Move breakables and remote controls off low surfaces
Kitchen
The kitchen is equal parts fascinating and dangerous to a small person. Two essentials do the heavy lifting.
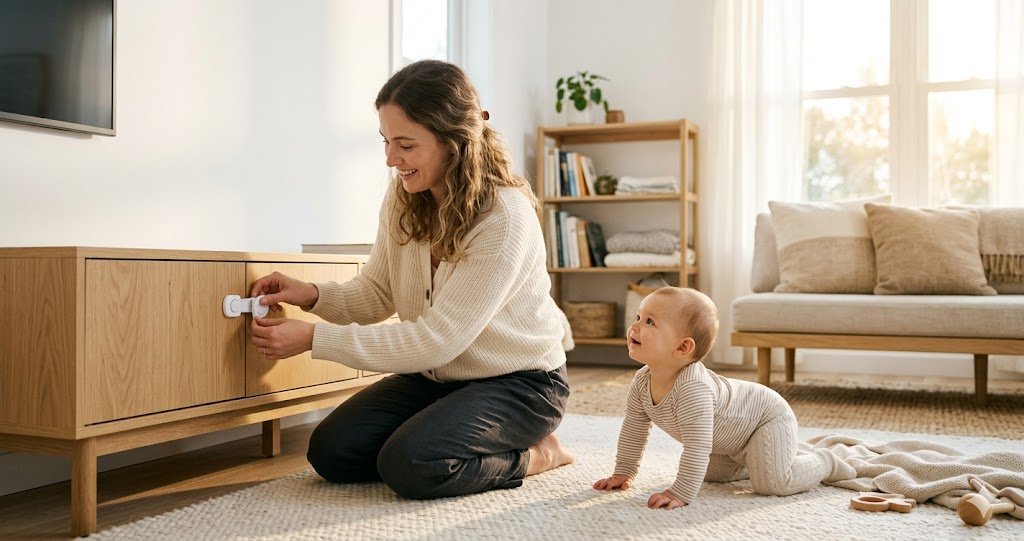
Cabinets & drawers → magnetic locks
Under-sink cleaners, sharp utensils, the pots they love to bang: locks keep all of it shut. I prefer the hidden magnetic kind over the external plastic latches because they don’t ruin the look of the cabinets and there’s nothing for little fingers to fiddle with. The Vmaisi magnetic cabinet locks are the category’s best seller and install with adhesive, no drilling.
Worth knowing: the adhesive needs a clean, grease-free surface to hold (it’s a kitchen, so wipe first), and the magnet key can get confused by a metal cabinet knob nearby. Just mount the lock half an inch further over.
Stove knobs → knob covers
A toddler can reach a front-mounted stove knob long before they understand what it does. The Safety 1st clear-view stove knob covers are the long-standing pick from a trusted name in child safety, and the clear lids let you see at a glance whether a burner is off.
Habit beats hardware here: cook on the back burners when you can, and turn pot handles toward the wall.
Kitchen checklist
- Lock cabinets and drawers with cleaners, knives, or chemicals
- Cover stove knobs; use back burners
- Add a fridge or oven latch if your kid is a determined opener
- Keep trash with hazards in a locked cabinet
- No tablecloths or dangling appliance cords a child can yank
Bathroom
Small room, real risks, mostly water. The bathroom door staying shut is your best first defense, but a toddler will get in eventually.
Toilet → lid lock
Toddlers are top-heavy and curious, and a toilet is a genuine drowning hazard. A Wappa Baby toilet lid lock opens one-handed for adults and can be switched off entirely when guests visit.
Before you buy: check that your lid is flat where the lock attaches. A raised lip or curved lid in that spot keeps the adhesive from gripping, which is the most common reason these “don’t work.”
Bathroom checklist
- Lock the toilet lid
- Set the water heater to 120°F
- Lock cabinets with medicine, razors, and cleaners
- Never leave standing water unattended
- Keep the door closed (a knob cover helps)
Stairs & Doors
Read this section closely, because this is the one people most often get wrong.
Stairs → baby gates (and the top-vs-bottom rule)
The AAP recommends gates at both the top and bottom of stairs, and the type matters enormously:
- Top of the stairs: use a hardware-mounted gate that screws into the wall, like the Toddleroo by North States Easy Swing & Lock gate. A pressure-mounted gate can be pushed loose by a leaning child, and at the top of a staircase that’s exactly the failure you can’t risk.
- Bottom of the stairs, doorways, hallways: a pressure-mounted gate is fine and easier to live with. The Regalo Easy Step gate is an all-steel, walk-through best seller (its own listing tells you, correctly, never to use it at the top of stairs).
If you only buy one gate, put a hardware-mounted one at the top of the stairs. For more on choosing sizes and walk-through styles, see our full baby gate guide.
Doors → knob covers (mind the shape)
EUDEMON door knob covers spin freely so a child can’t turn the knob, and they’re a Mom’s Choice winner. The catch: they fit round knobs only (roughly 1.4–2 inches across). If your doors have lever handles, you need a lever lock instead, so check before you order.
Slamming doors → finger pinch guards
A door swinging shut on a small hand is one of those injuries you only need to witness once. The Wittle finger pinch guards are soft foam C-shapes that slip over the door’s edge and keep it from closing all the way. Mount them up high, out of your kid’s reach, or they’ll become a toy.
Stairs & doors checklist
- Hardware-mounted gate at the top of every staircase
- Pressure-mounted gate at the bottom and in risky doorways
- Knob covers (round knobs) or lever locks (lever handles)
- Pinch guards on doors that swing shut
- Keep the front door secured so a walker can’t slip outside
Bedroom, Nursery & Windows
The nursery feels safe, so it’s easy to under-do it. Two hazards matter most: window-blind cords and, again, furniture. Keep any baby monitor cords well out of the crib, too.
Blind cords → go cordless, or use cord cleats
Looped window-covering cords are a strangulation hazard, full stop. The safest fix isn’t a gadget at all. It’s choosing cordless blinds and shades for any room a child sleeps or plays in, which is the gold standard from child-safety groups and worth it when you’re replacing window coverings anyway.
For the corded blinds you already own, wind the cords up high and out of reach with Magicfour cord cleats, a small metal hook that mounts to the wall. Treat it as a stopgap, not a substitute for cordless.
Bedroom & nursery checklist
- Cordless blinds where possible; cord cleats for the rest
- Anchor the dresser and changing table
- Window guards or stops on reachable windows
- Crib clear of pillows, bumpers, and cords
- Nightlight outlets covered, monitor cords out of the crib
What to tackle first
If the whole list feels like a lot, here’s the order I’d actually go in. Do the top group this weekend; the rest can wait a paycheck.
- This weekend: anchor furniture and the TV, deal with blind cords, lock away cleaners and meds.
- Before they crawl well: outlet covers, low-cabinet locks, corner guards, a gate at the stairs.
- Once they walk and climb: toilet lock, stove knobs, door knob covers, pinch guards, and a re-check of every anchor.
FAQ
When should I start baby proofing?
Before your baby is mobile. Crawling often starts around 6–10 months, and you want the basics (anchored furniture, covered outlets, secured cords) all done before then. Anchoring and cord safety can honestly be done in the newborn months.
Do I really need to anchor furniture if my dresser feels heavy?
Yes. “Feels stable” and “won’t tip when a toddler climbs the open drawers” are different things. Anchoring is the single highest-value item on this list, and it takes ten minutes.
Are plug-in outlet caps safe?
They’re fine for outlets you never use, but the caps are small enough to be a choking hazard if a child pries one out, and they’re inconvenient for outlets you use daily. Sliding or box-style covers are the better choice for live outlets.
Can I just use pressure-mounted gates everywhere?
At the bottom of stairs and in doorways, yes. At the top of stairs, no. Use a hardware-mounted gate that screws into the wall, every time.
How do I baby proof at grandma’s house?
Do a quick version of the crawl-through yourself rather than relying on someone else, since you know what your kid gets into. A few travel-friendly basics go a long way: a couple of outlet caps, a handful of cabinet latches, and corner guards pack flat in a diaper bag. For stairs at a relative’s home, a pressure-mounted gate at the bottom is the easy temporary fix.
Little Loving Life is written by a mom of three drawing on ten years of hands-on parenting. Product recommendations are researched against current safety guidance and real-world reliability; this guide is general information, not a substitute for active supervision or your pediatrician’s advice.